If you want to adjust the size and clarity of the items on your screen, you can change the screen resolution in Windows 11. The screen resolution is the number of pixels your monitor can display horizontally and vertically. A higher resolution means more pixels and details but can also make the items smaller and harder to read. A lower resolution means fewer pixels and fewer details, but it can also make the items bigger and easier to read. Changing the screen resolution in Windows 11 is easy and quick. Here are the steps to follow:
Things you should know about the display resolution
In most situations, Windows 11 can identify the aspect ratio and resolutions your display supports. In other words, unless you have an exotic monitor or something strange happens, the operating system should be able to set the maximum resolution available for your display automatically. But, if something doesn’t work correctly, you may want to fix the screen resolution on your Windows 11 PC. For example, if you know that you have a 1080p monitor, even if the operating system doesn’t identify it properly, you could force a 1920 x 1080 resolution in Windows 11. Or if the system automatically sets your 4K monitor to a 3840 x 2160 resolution, but you believe that 1440p is the best resolution for your Windows 11 computer, you may want to change the display resolution manually.
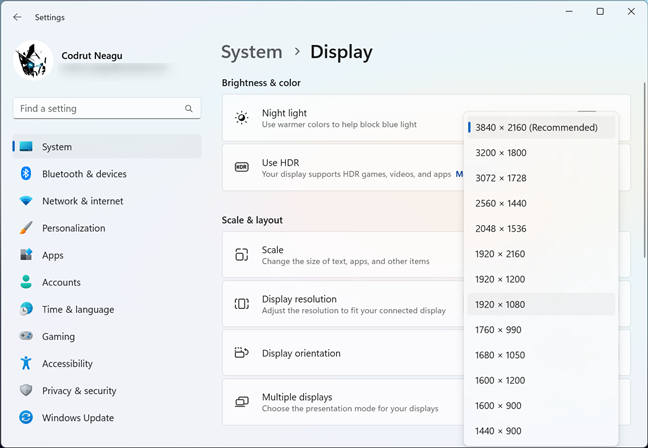
Resolutions available on a Windows 11 PC with a 4K display
Whatever the reason, before actually changing the screen resolution, you should understand the context and notions related to display resolutions. That’s why I believe it would be best if you read this article first: What do 720p, 1080p, 1440p, 2K, 4K, and other resolutions mean?
How to change the screen resolution in Windows 11
To change the screen resolution in Windows 11, you must first get to the Display settings. The fastest way to do that is to right-click (or press and hold) on an empty place on your desktop and select Display settings in the context menu.
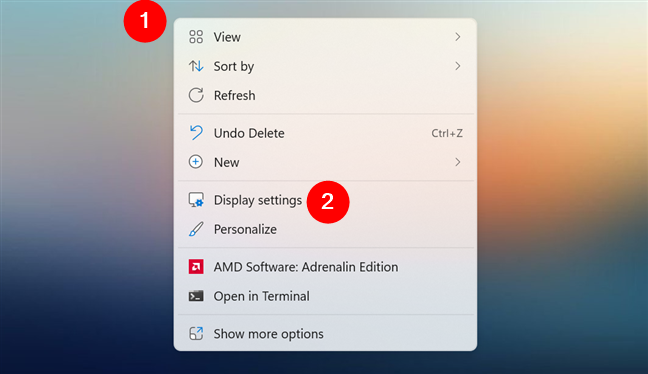
How to open Display settings in Windows 11
Alternatively, you can launch the Settings app (Windows + I), select System in the left sidebar, and click or tap Display on the right.
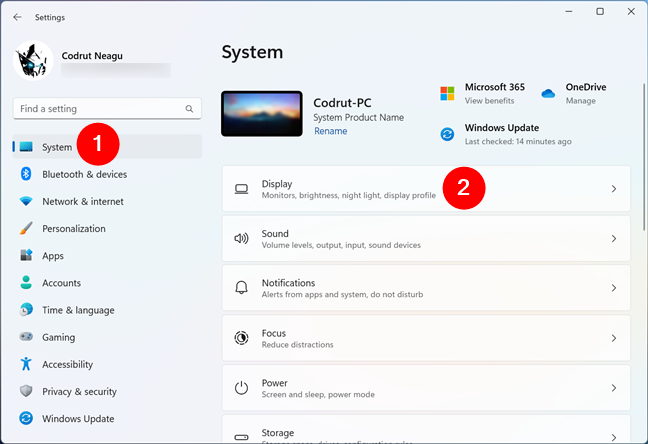
The Display entry from Windows 11's Settings
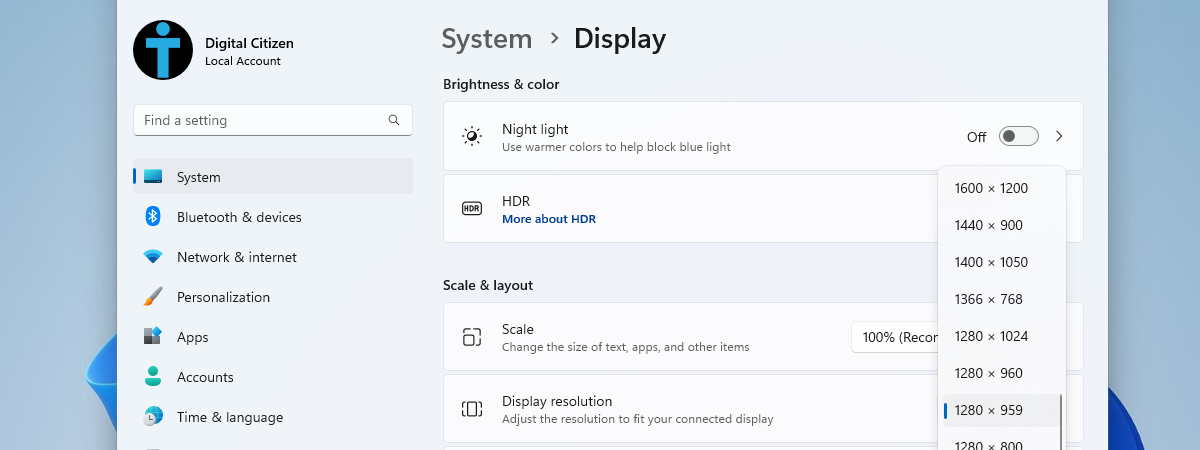
Either way, the Settings app should now show you the Display page, where you can change the screen resolution, as well as other various aspects regarding how Windows 11 is displayed. The resolution currently used by your screen is shown next to Display resolution.
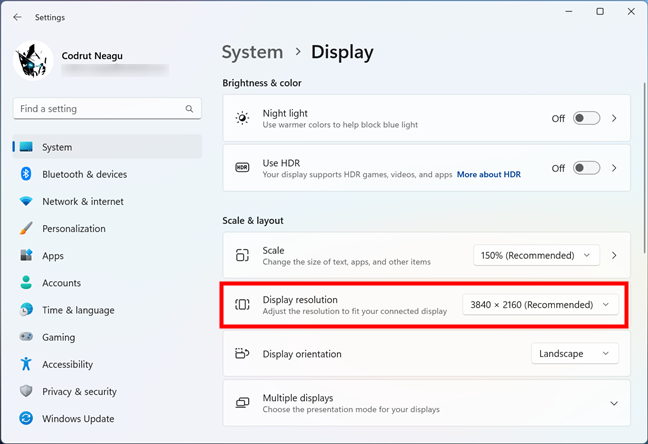
The current Display resolution in Windows 11
If you want to modify the resolution, click or tap the current Display resolution. This opens a dropdown list, where you can choose another screen resolution you prefer.
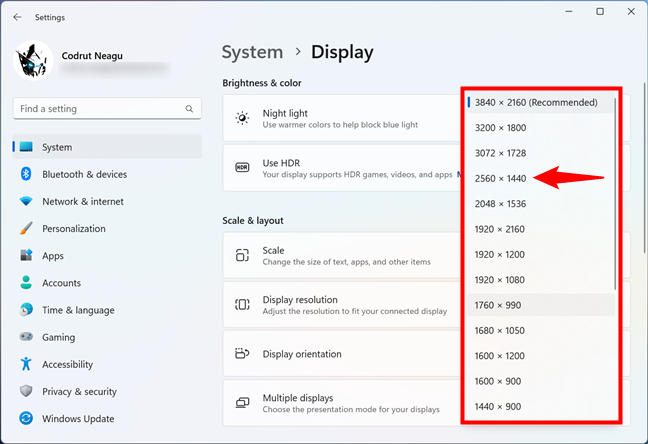
How to change the display resolution in Windows 11
NOTE: The number of screen resolutions available and the maximum display resolution listed depend on your computer monitor or laptop display. For instance, if you have a 4K monitor, the maximum resolution you can set is 4K (usually 3840 x 2160). Similarly, if you have a 1440p screen, you can set a resolution of about 2560 x 1440 pixels or less. And, in most cases (including the two examples above), you should have the option to force a 1920 x 1080 resolution in Windows 11.
Once you’ve selected the resolution you prefer, Windows 11 applies it and shows a dialog asking if you intend to “Keep these display settings.” The question is shown for 15 seconds, which gives you plenty of time to “Keep [the] changes” or Revert to the previous display resolution. If you don’t give any answer, Windows 11 assumes there was a problem with the new resolution and automatically reverts to the previous one after the 15 seconds pass.
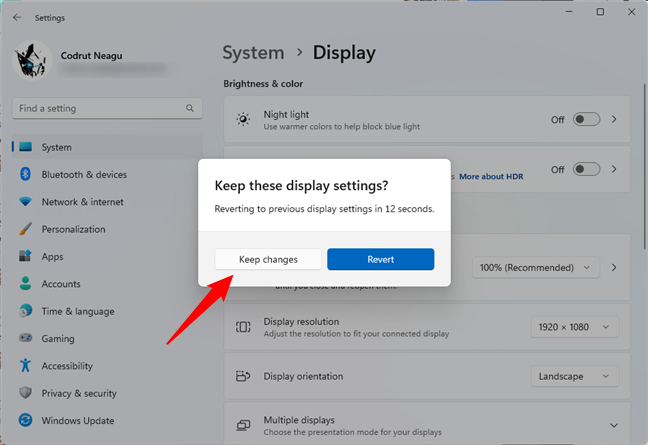
Keep these display settings?
And that’s all! From now on, your display will use the new screen resolution selected in Windows 11’s Settings.
TIP: If you can’t change the display resolution on your Windows 11 PC using a mouse or touch, you can use your keyboard. Just press the next keys one after the other: Win + I (opens Settings) > Tab (7 times) > Enter > Tab (7 times) > Enter > arrow keys (to select the new resolution) > Enter > Tab > Enter.
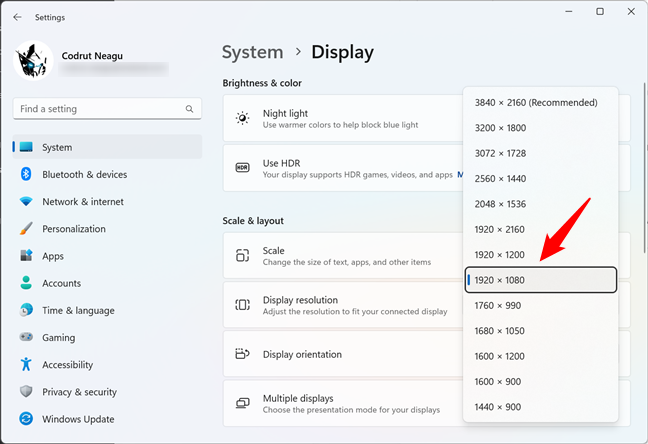
How to set the display resolution in Windows 11 using a keyboard
How to make text, apps, icons, etc. larger or smaller in Windows 11
If you decide to use a higher or lower display resolution than recommended, some of the items displayed may start looking bad on your screen. For instance, forcing a 1920 x 1080 resolution on a Windows 11 PC with a 4K monitor will make the text too large to read comfortably. Similarly, if the best display resolution for your Windows 11 PC is 1440p, but your screen has a small diagonal, the text may become too small to read easily, and the apps too little to use comfortably. The good news is that Windows 11 lets you change the display scaling no matter your resolution. Here’s how:
Reopen the Settings app (Windows + I) and return to System > Display. On the Display page, locate and click or tap the scaling percentage next to Scale. Notice that Scale clearly states that you can use it to “Change the size of text, apps, and other items.”
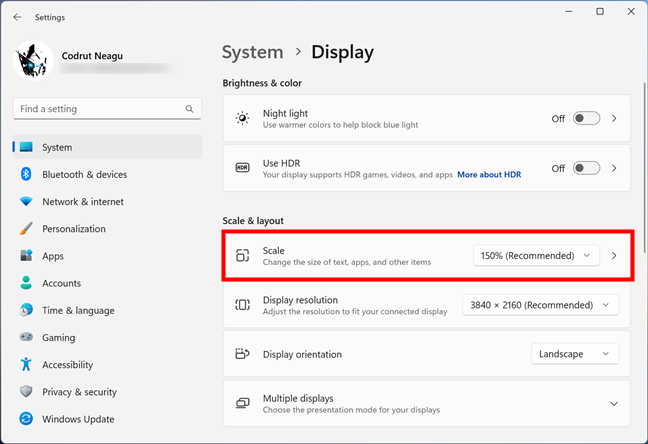
The Scale section in Windows 11's Settings
The Scale list of percentages will then show you a series of options that are automatically calculated by Windows 11 in order to match your screen resolution. Select any scaling value, and the operating system immediately applies it; no further confirmation is required.
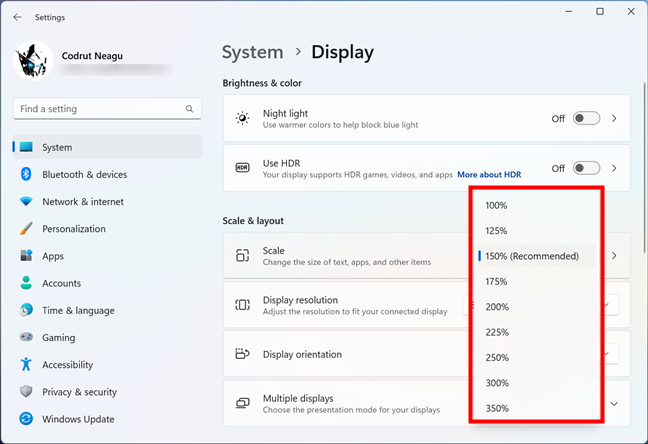
Display scaling options in Windows 11
If you still don’t like how the text, apps, icons, and other items on the screen look, select another scaling percentage. If needed, repeat this action again and again until you find the perfect balance between scaling, your display resolution, and your screen size.
How to change screen resolution and scaling in Windows 11 if you have multiple monitors
Some people love working on two, three, or even more monitors simultaneously. If you’re one of them, the Display page from Windows 11 looks like this:
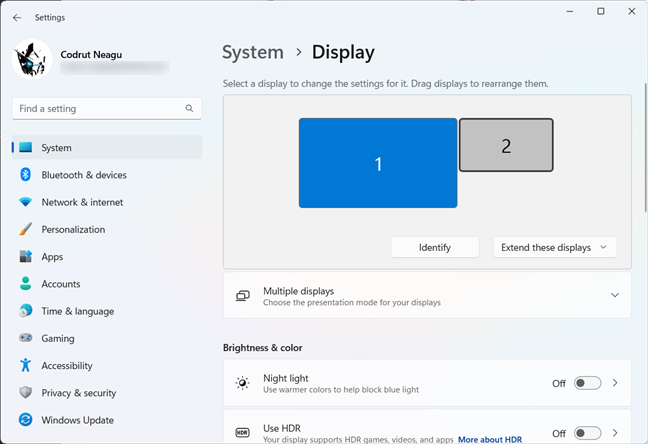
How to change the display resolution in a multi-monitor setup
As you’ve noticed, two monitors are displayed in the previous screenshot. If you have more, all of them will be shown on the Display page. However, no matter how many you’re using, you can change the resolution and scale for each monitor individually. The steps are the same as the ones illustrated in the previous chapters of this tutorial, but before you take them, select the display you want to modify. And you can do that by clicking or tapping the screen you want on the Settings > System > Display page.
Potential consequences of screen resolution changes
If you’ve decided that you know what’s the best display resolution for Windows 11, and you choose to ignore what the operating system recommends, you might encounter some problems:
- If the screen resolution you’ve set is higher than the previous one, applications and games with demanding system requirements can become noticeably slower. That’s because the generated frames require more performance to render at higher resolutions. This is immediately obvious in high-end games when your graphics card can’t handle the burden. Usually, the fix is a lower resolution on your Windows 11 PC. Take your time to experiment with the various resolutions and scaling values until you find the best display resolution for your Windows 11 device.
- Secondly, and as also briefly mentioned throughout this article, you may discover that everything on your screen looks different than before. Text, app windows, icons, and other items can be displayed differently and have different sizes. In some situations, they may have become too large, while in others, they may be so small that it’s hard to read or use them. If changing the scaling doesn’t repair things for you, you might want to fix your screen resolution in Windows 11 by reapplying the old one.
What screen resolution are you using?
You have successfully changed the screen resolution in Windows 11. You can experiment with different resolutions until you find the one that works best for you. Changing the screen resolution can improve your viewing experience and productivity, so don’t be afraid to try it out. Did you decide what’s the best display resolution for your Windows 11 computer? In the comments section below, let me know if you have any questions or tips.


 17.08.2023