When creating or editing documents in Microsoft Word, the first design question you need to address is the page orientation. It all depends on the purpose of your document. Do you have a mostly text document that is easier to read with a vertical layout? Alternatively, do you want to take advantage of a larger width to capture the visual field better? Whatever is your reason to change the orientation of your Word document, read this guide to help you set it up:
NOTE: This tutorial applies to both the desktop and the mobile versions of Microsoft Word, found in Microsoft Office, Office 365, Android, iPhone and iPad (iOS).
What is the orientation in a Microsoft Word document?
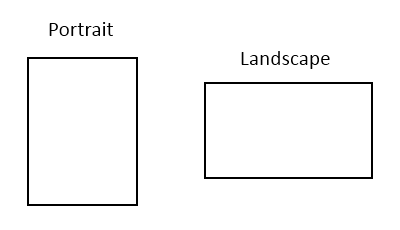
The page orientation in Microsoft Word can be either portrait or landscape. The names are derived from the visual arts and describe two subjects captured in a picture shaped like a rectangle: the portrait of a person or natural scenery also known as landscape. The critical element is whether the vertical or the horizontal side of the rectangle is bigger. In a portrait, you need more detail on the vertical, while in a landscape you need more width to capture the horizon.
As a rule of thumb, the pages with mostly text are easier to read in portrait orientation. The human eye has limitations when it finishes one line of text, and it needs to find the beginning of the next one. Make the page width too large, and your readers struggle to read your pages. The landscape orientation allows more elaborate designs that usually involve tables, columns or images.
How to change the orientation for all pages in the desktop versions of Microsoft Word
To help our readers, we use an example in which we switch the pages in a document from Portrait to Landscape. Although we show an existing document where we switch the page orientation, you can run the same change for an empty document too. If you know the page orientation for your document from the beginning, it is better to apply it before you create the content. Your design decisions (such as font size and placement of images) are likely to change based on the page orientation you choose.
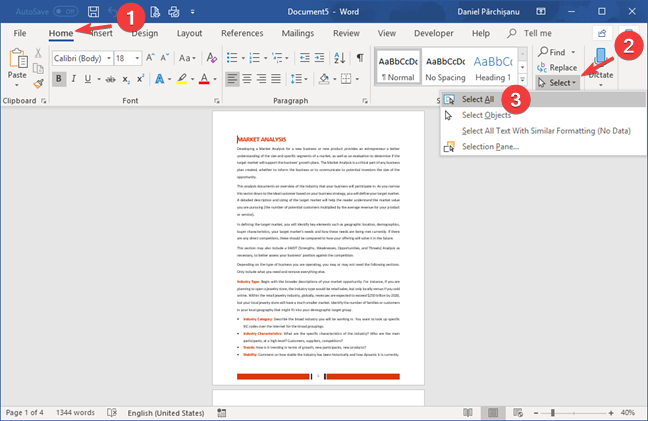
In Microsoft Word, open the document where you want to change the page orientation. The first step is to select the entire document before applying the changes:
Click or tap Home to make sure this tab is selected on the ribbon. Locate the Editing section on the right side of the ribbon. Click or tap the Select button to open the drop-down menu and click or tap Select All. Alternatively, use the CTRL + A keyboard shortcut.
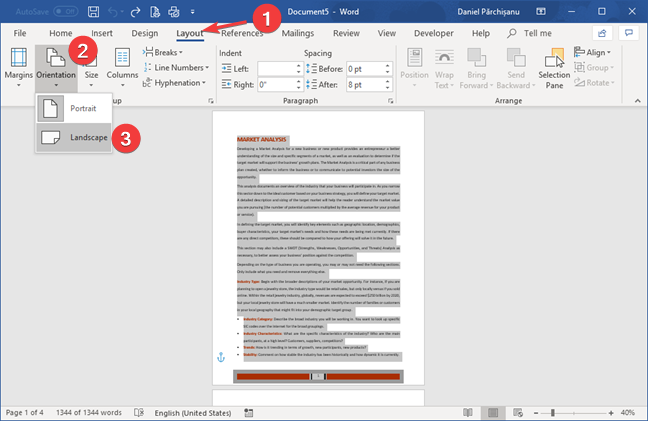
With the entire document selected, switch to the Layout tab on the ribbon by clicking or tapping on its name.
Locate the Page Setup section on the left side of the ribbon and click or tap the Orientation button. From the drop-down menu that opens, choose Landscape or Portrait to apply your desired page orientation.
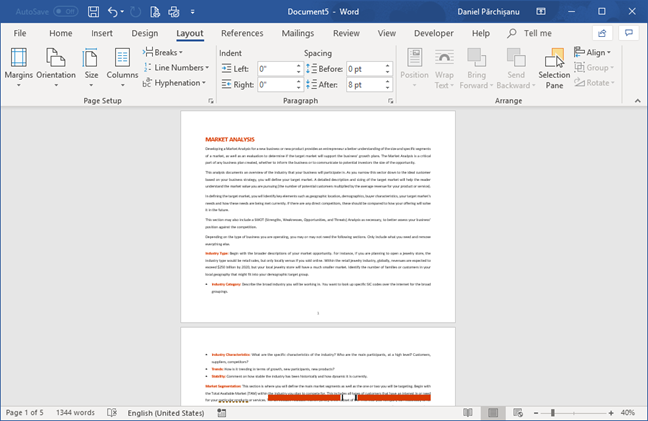
We selected Landscape, and the new page orientation is applied immediately.
IMPORTANT: The same procedure applies for the reverse change; you need to choose your desired page orientation in the last step. We asked you to select the entire contents of the Word document, because, if you do not, the change in orientation gets applied to the current section, and not to the whole document. However, many documents are not split into sections and, in that case, selecting the entire contents first is not a mandatory step.
How to change the orientation for all pages in a document, using Microsoft Word for Android or iOS (iPhone, iPad)
The steps involved are almost identical in the Word app for Android and that for iPhone or iPad (iOS). In this section, we share screenshots side by side, with Word for Android on the left, and Word for iOS on the right. Let's get started:
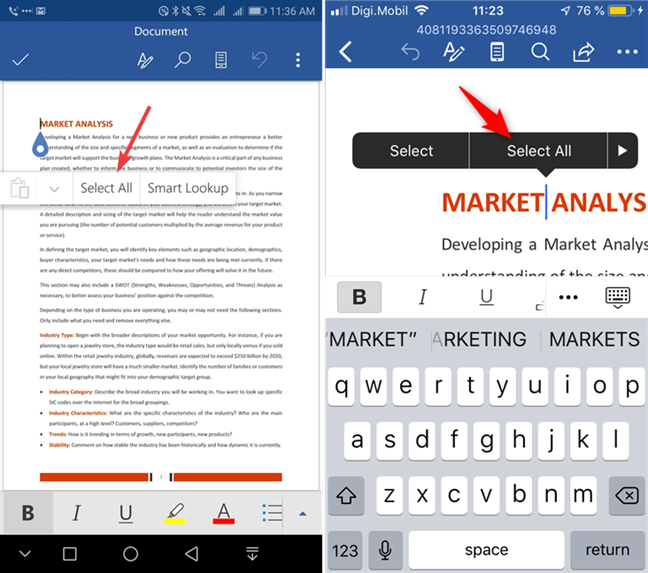
On your smartphone or tablet, open the document where you want to change the page orientation in Microsoft Word. Tap anywhere in the document, and a menu appears. Then, tap Select All.
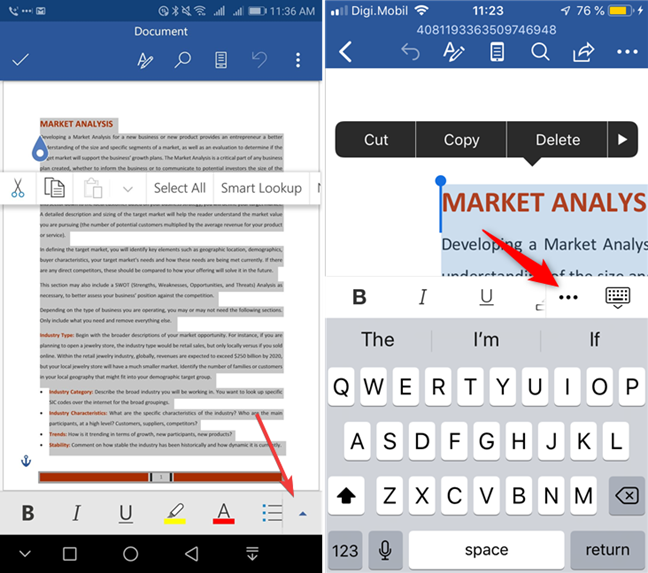
Bring up the full menu with editing options for Word, on the bottom part of the screen. To do that on Android, tap the up-pointing arrow on the bottom-right. On the iPhone or iPad, tap the three-point button above the keyboard.
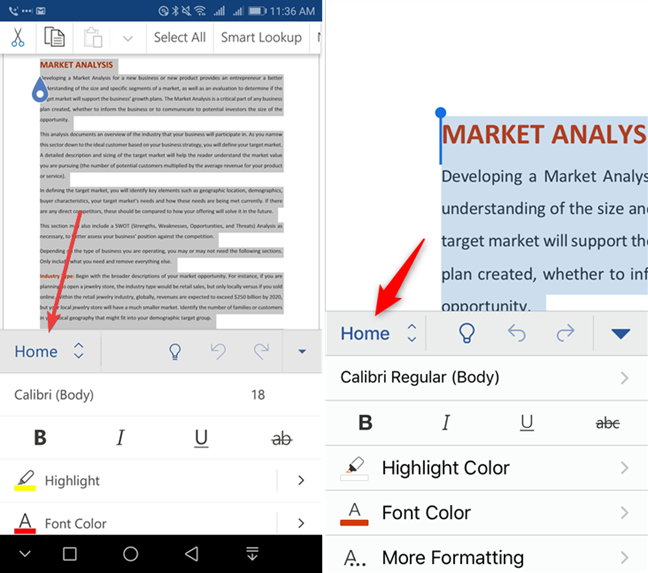
Tap Home in the menu to open a drop-down with other editing options.
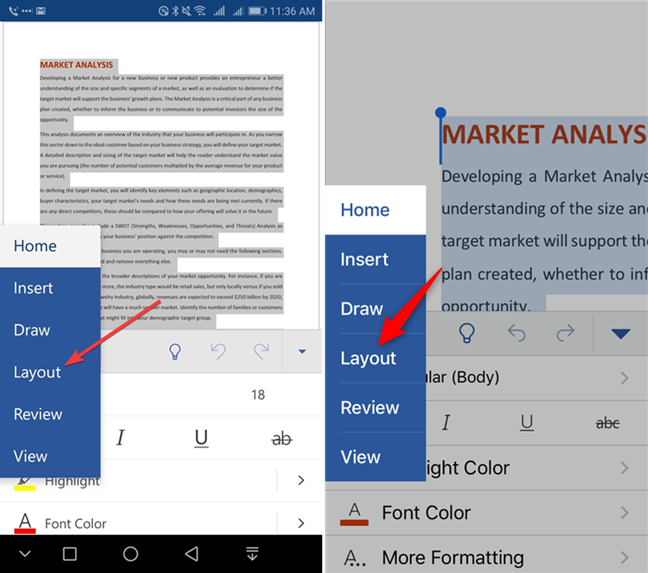
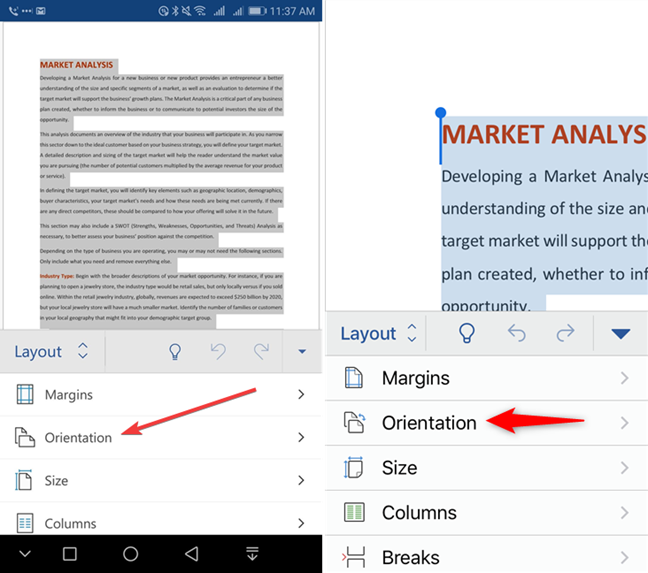
Choose Layout and tap on it.
Underneath, the Layout options, tap on Orientation.
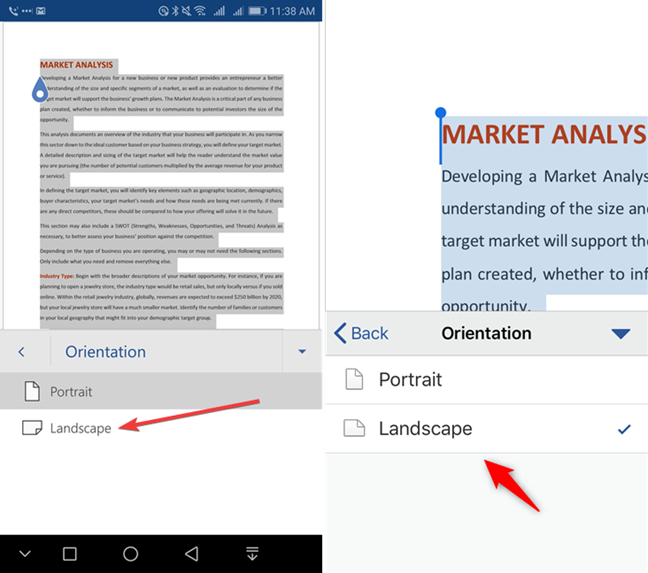
Choose your desired page orientation: Portrait or Landscape. In our example, we selected Landscape.
The new page orientation applies immediately to your Word document. The same procedure applies for the reverse change.
IMPORTANT: Changing the orientation of a document in the Word mobile app for Android and iOS, is available only if you are an Office 365 subscriber. Otherwise, if you try to perform the steps we showed, you are told that you cannot use these features.
What made you change the orientation of your Microsoft Word document?
The page orientation for a Word document is driven by the content that you want to create. Microsoft Word sets the Portrait orientation by default, which ends up as the most commonly used. However, for a brochure or a calendar page, the Landscape orientation is a better design choice. Before closing this tutorial, tell us what motivated you to make page orientation changes. Comment below and let's discuss.


 28.11.2018