Knowing how to change the language on Windows 11 comes in handy, especially if you have a new computer or device. The first step to change the Windows display language is to get the language pack you need from Microsoft’s vast collection. You only have to do this once for every language you want to use because switching between languages becomes easier afterward. This guide shows how to change the Windows 11 language from English to Spanish both while installing a language pack and once that’s already done. However, you can follow the same steps to switch to any other language you’re comfortable with. Besides, suppose you want to change the language on Windows 11 because you don’t understand the current one. In that case, we provide clues and details about the settings you need. Let’s get started:
How to change the Windows 11 language when you install a language pack
If your Windows 11 device is not in the language you want, you must get a new language pack first. To make things easier, Microsoft lets you change the language on Windows 11 as soon as the corresponding language pack is installed. To begin, open Settings by pressing Windows + I on your keyboard. Next, from the left sidebar, go to Time & language, whose icon looks like a clock next to a globe. Then, on the right, click or tap on the second section, Language & region, whose icon features the letter A.
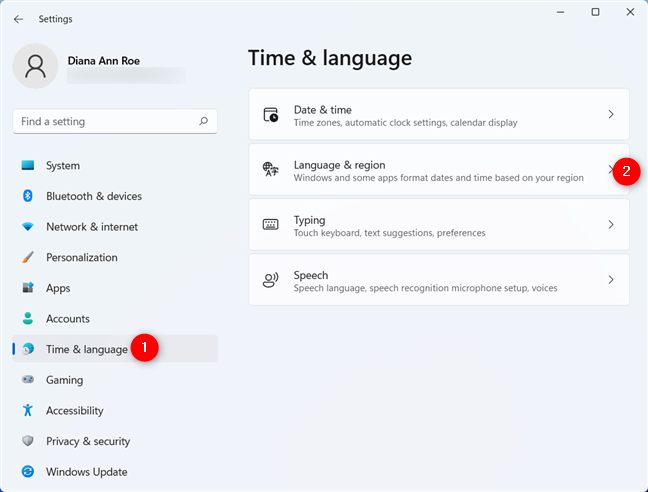
Access Language & region from the Time & language tab
Next, you can see the installed Windows 11 language packs displayed under Preferred languages. If the language you want isn’t there, click or tap on the blue “Add a language” button.
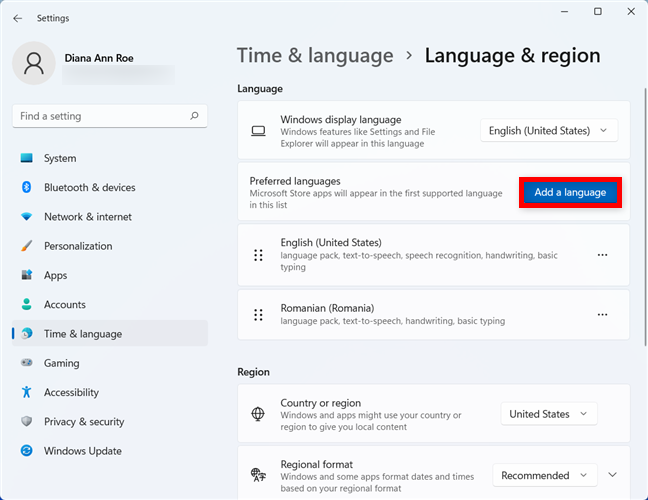
Adding a language to Windows 11
NOTE: If the language is on this list, the language pack you need is installed on your Windows 11 computer or device. Skip to the next chapter of this guide to see how to change the Windows display language.
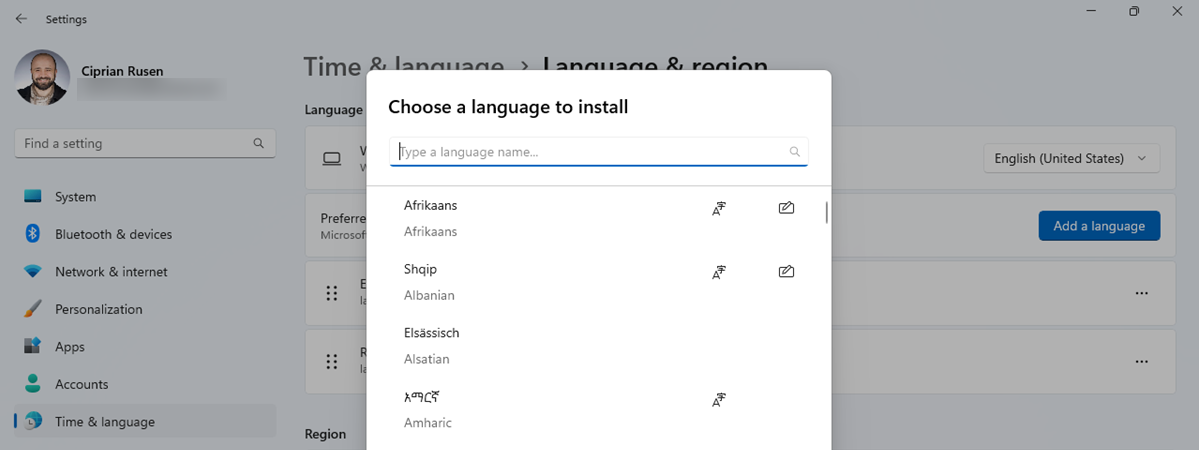
A window pops up with all the available Windows 11 languages listed in alphabetical order. Since there are over two hundred language packs in this list, we recommend using the search box at the top to find the desired Windows 11 language pack.
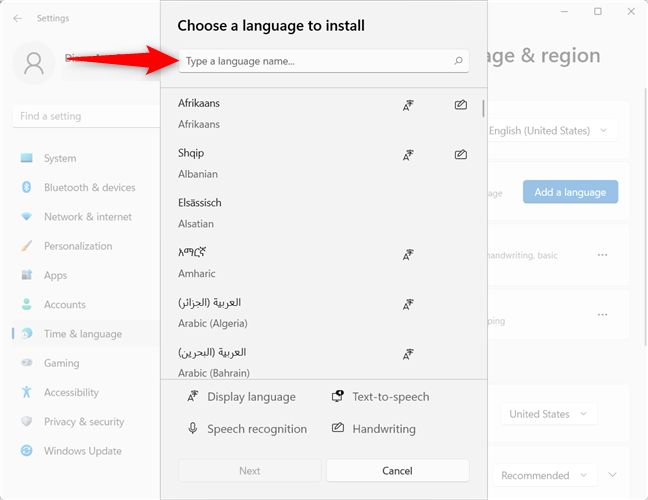
Type a language name to find the one you need
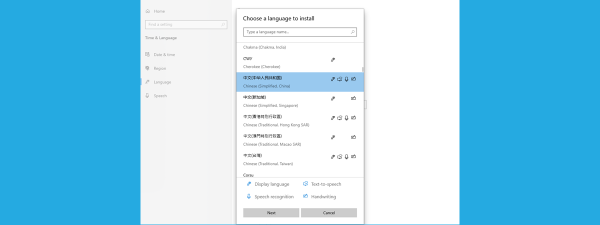
The next step is to type the name of the language you want - in our case, Spanish. Some languages have more versions or language packs available, so you might have to choose the version specific to your region or country. Check what’s included with the Windows 11 language pack you are about to install before you decide. There can be up to four icons next to every available entry:
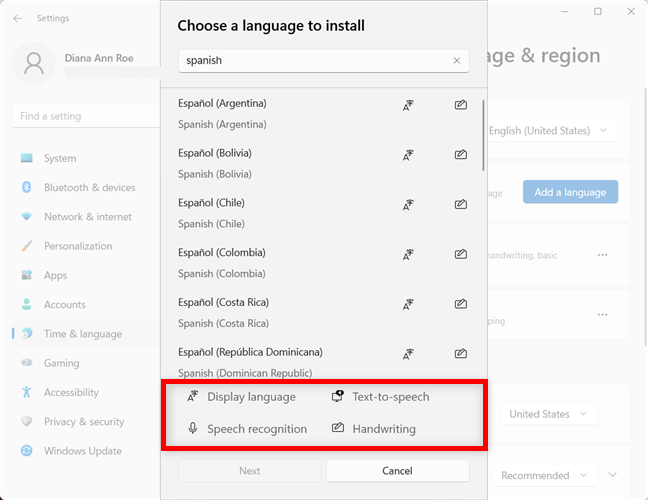
In Windows 11, change the language to one with the features you want
- Display language - The icon featuring the letter A indicates that you can change the Windows display language to this one. The language you select should have this symbol next to it.
- Speech recognition - The microphone icon lets you know that there are speech recognition services available for that language, so Windows 11 should be able to understand what you’re saying.
- Text-to-speech - The computer display and text bubble icon indicates that Windows 11 speaks this language.
- Handwriting - The pen-on-paper icon shows there’s handwriting recognition available for a language. This is useful for tablets with pens and touchscreen devices.
Review all the available options, click or tap on the Windows 11 language pack you want, and then press Next, the button on the lower-left corner of the pop-up.
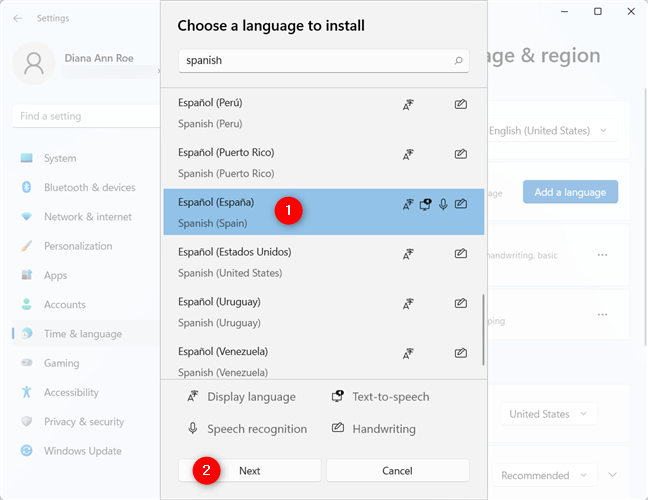
Select the Windows 11 language you want and press Next
On the “Install language features” page, you can see the available options for the selected language. Under “Optional language features,” select any other Optional language features you want to use, and make sure the first optional feature - Language pack - is checked. That’s the one you need to change language in Windows 11.
Click or tap on the “Set as my Windows display language” option under Language preferences to check it and change the Windows language right away. Note that you can also change the language later, as shown in the next chapter. Then, click or tap on the Install button in the lower-left corner.
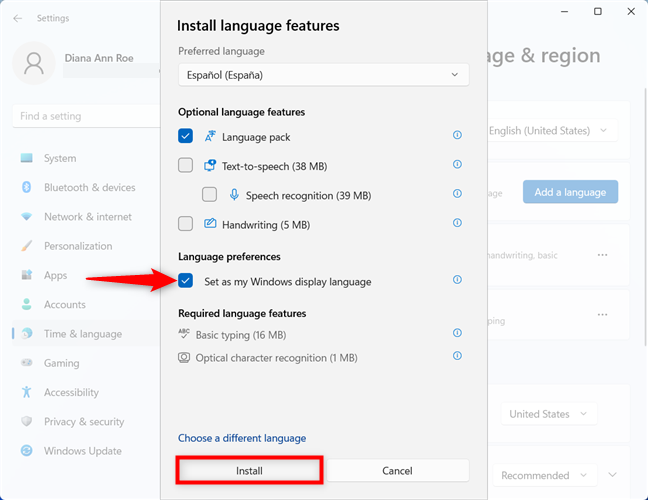
Change the display language in Windows 11 when installing a language pack
Back on the Windows 11 language settings screen, you can follow the download of the selected language pack.
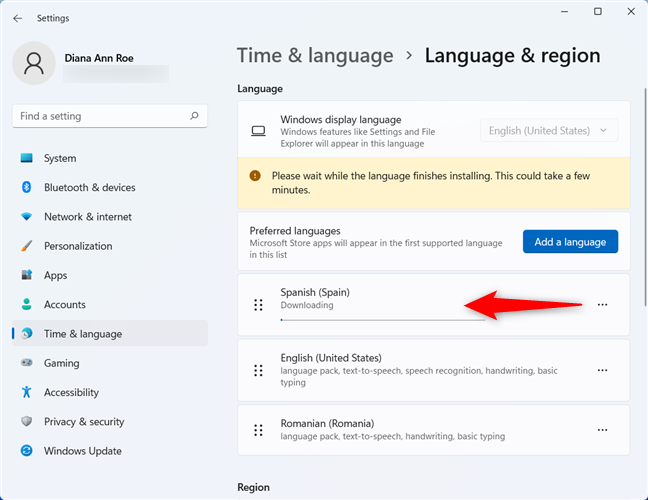
Wait for the language pack to finish downloading
When the language pack download is finished, the new language is added under “Preferred languages.” You are notified that “Windows needs to sign out in order to apply your new display language.” Click or tap on Sign out.
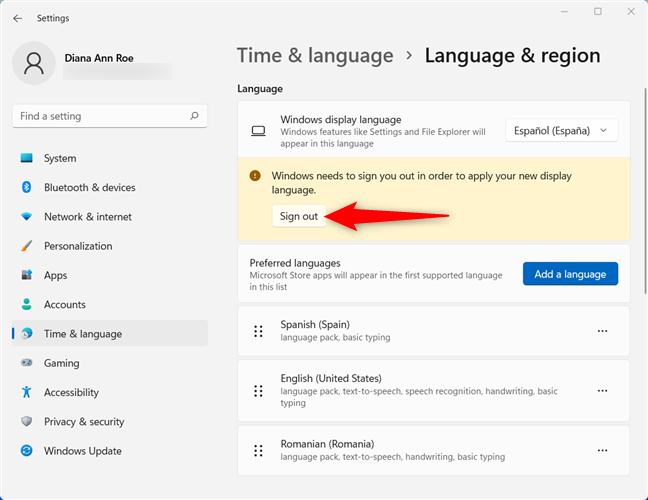
Sign out to finish changing the Windows 11 language
When you sign back in, Windows 11 is displayed in the language you selected.
How to change language on Windows 11 when its language pack is already installed
After installing a language pack, it becomes available in the Windows 11 language settings, so it’s much easier to apply it. In the Settings app, go to the Language & region section, as shown in the previous chapter, and then click or tap on the box next to “Windows display language” at the top. In the dropdown menu that opens, select one of the language packs installed on your Windows 11 computer or device.
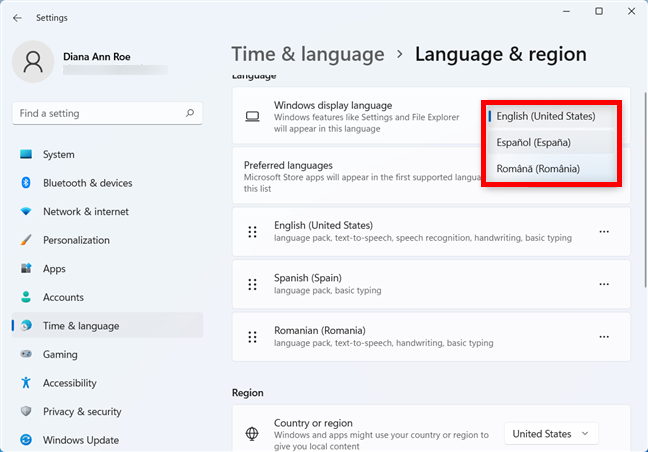
Change the Windows 11 display language when you have the language pack
Click or tap on Sign out to apply your settings.
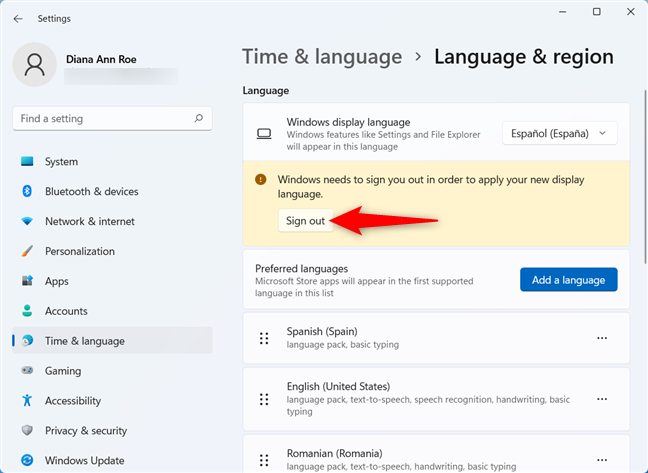
Sign out to apply your new language settings
When you sign back in with the same user account, Windows 11 is displayed in the language you selected.
How to change the language of apps in Windows 11
When you change the language in Windows 11, it also becomes the default for Microsoft Store apps, like Photos, Calendar, or Mail. However, your operating system can use one display language and your Microsoft Store apps another.
In the Language & region settings, under Preferred languages, find the name of the language you want to use for your Microsoft Store apps. Click or tap on the three dots button next to it to reveal a dropdown menu. Use the Move up and Move down options to arrange the languages in the order you prefer. If the first language is not supported, the second one is used, and so on, which can be helpful if you’re working with multiple languages in Windows 11.
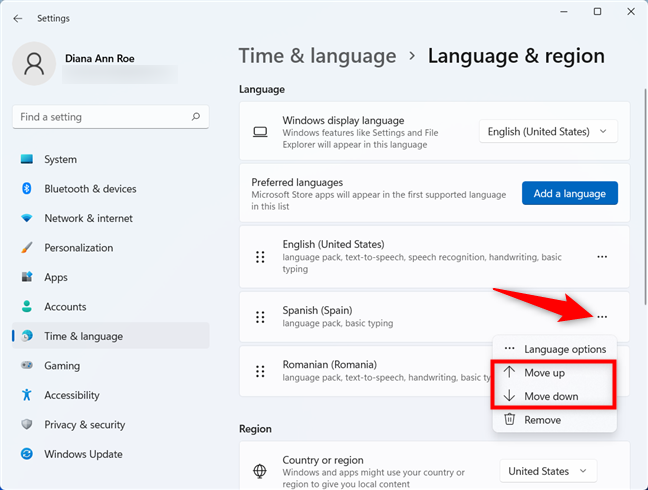
Use a different language for Microsoft apps
When you are done, close the Settings app. There’s no need to sign out in this case. Windows 11 is now using a different display language than your Microsoft Store apps. However, desktop apps, like Microsoft Edge or Google Chrome, or apps downloaded from places other than the Microsoft Store continue to use the Windows display language.
If your language uses special characters, you might have difficulties with certain apps, like media players being unable to use all the characters of your local language and displaying song titles or subtitles incorrectly. To fix this, read our guide on setting the language of non-Unicode programs in Windows.
What did you change the Windows display language to?
Changing the Windows 11 language is easy after installing the desired language pack(s). Signing out and reopening your apps seems to be the only inconvenience if you keep changing the Windows display language. We’re curious about what languages you’re using in Windows 11 and how often you switch between them. Did you find the language pack you needed? What was it? Let us know in the comments.


 07.09.2021