Ever wonder how to change the name of your iPhone? Your iPhone is an extension of you and your digital (citizen🙂) life, so it deserves a fun and unique identity. By default, your iPhone name includes your real name. If you want to protect your privacy when you’re using Airdrop, Personal Hotspot, or connecting to a Wi-Fi network, it’s a good idea to change your iPhone name to something else. This should also make it easier to identify and avoid confusion if you own multiple iPhones. So, without further ado, here’s how to name your iPhone in five easy steps:
Step 1: Open the Settings app
The first step to change your iPhone name is to open the Settings app. You should find it on your Home Screen, as shown below, but there are also other ways to open the iPhone Settings.
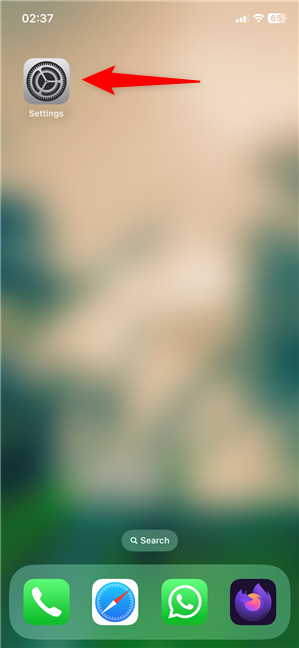
Start by opening the Settings app on your iPhone
Step 2: Access General Settings
On the Settings screen, tap the General entry.
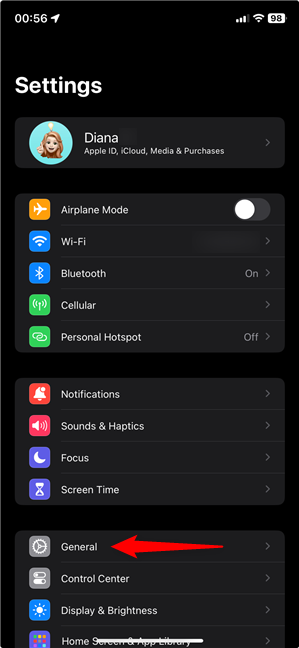
Access the General Settings on your iPhone
Step 3: Tap on About
The first entry on the General screen is called About. Tap on it.
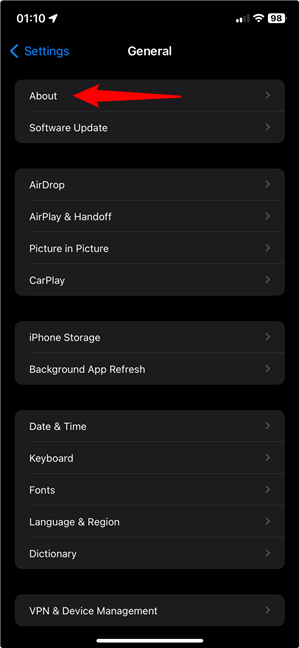
Access About to see your iPhone name
Step 4: Access your iPhone’s Name
The Name of your iPhone is shown at the top of the About screen.
Tap on this first entry to change the iPhone name.
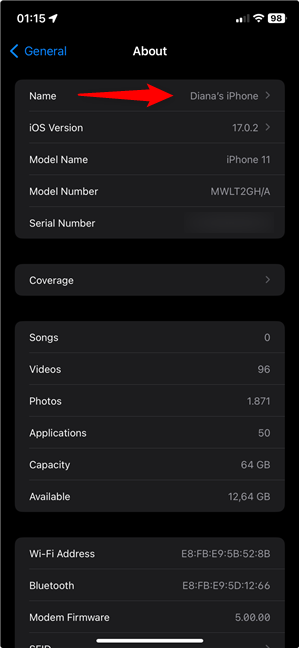
Tap Name to change the name on iPhone
Step 5: How to change the name of your iPhone
On the Name screen, tap the x button next to your iPhone name to delete the current name.
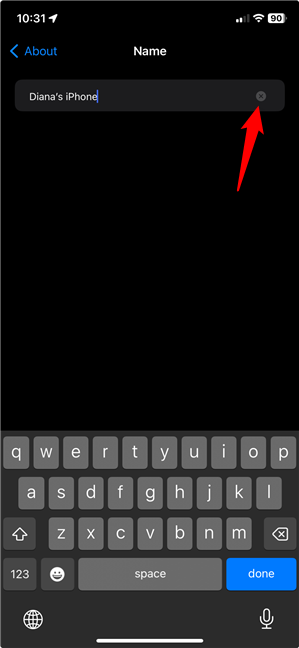
Use the x to delete the current iPhone name
Next, use the keyboard at the bottom to insert a new name for your iPhone. Tap done when you’re happy with the new iPhone name.
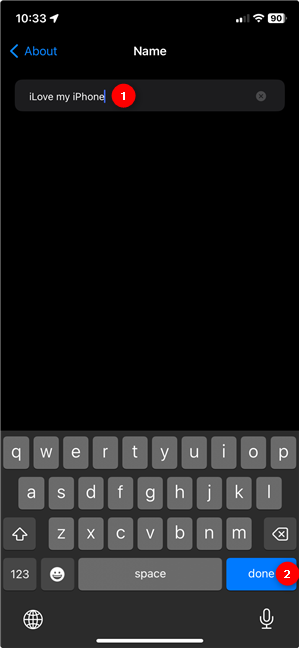
How to change your iPhone name
That’s it! Back on the About screen, you can see the new iPhone name, which is also used by iCloud, AirDrop, your iPhone hotspot, and your computer.
Why did you change your iPhone name?
Now you know how to change your iPhone name. As you’ve seen, the process is quick and easy, and the change is applied instantly. Before you close this guide, let us know your reasons for changing the name of your iPhone. Did you have security concerns, or did you want to change the device name on iPhone just to spice things up? What name did you choose for your iPhone? Let me know in the comments section below.


 05.10.2023

