Many people don’t know this, but all computers have a unique name they received either from Microsoft (when installing Windows), their manufacturer, or their users. A computer’s name is useful mostly when inside a network to separate and identify itself from other computers and devices. By default, Windows computers have boring names like DESKTOP-3Q67JPL, but they can be changed if you know how. If you’re curious to know more, here are four ways to change the name of any Windows computer:
IMPORTANT: Before deciding whether you want to change your computer name, first, find out what your device name or computer name is in Windows.
1. How to change your PC name in Windows 10 from Settings
If you’re using a Windows 10 laptop or desktop computer, open Settings (Windows + I). Go to System > About. On the right, look for the “Rename this PC” button and click or tap on it.
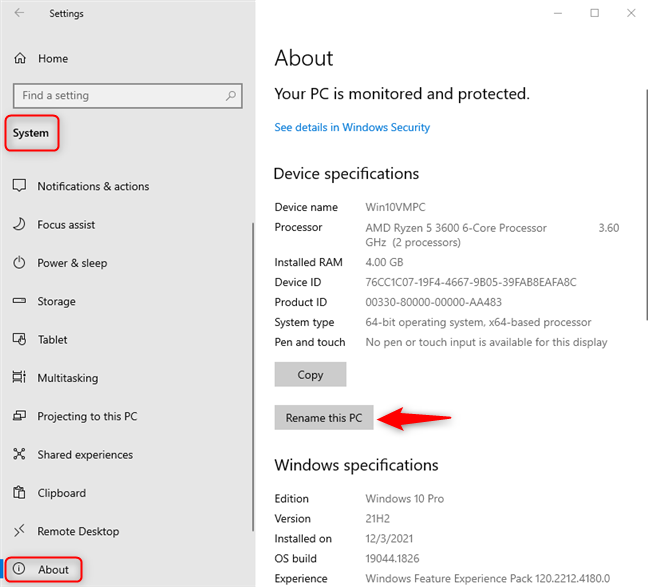
Go to System > About > Rename this PC
You see the Rename your PC window, displaying the current PC name. Type the new name you want, and press Next.
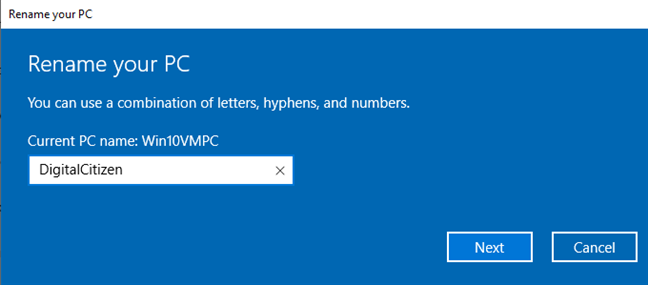
Type the new PC name
You are informed that you need to restart your Windows 10 PC for the renaming to be applied. Choose between Restart now and Restart later. If you want to restart immediately, make sure you close all open apps and files.

Restart to apply the change
After you sign in to Windows 10, your PC has a new device name.
2. How to change your PC name in Windows 11 from Settings
If you have switched to Windows 11, open Settings (Windows + I). In the left sidebar, choose System. On the right, scroll down to About and click or tap on it.
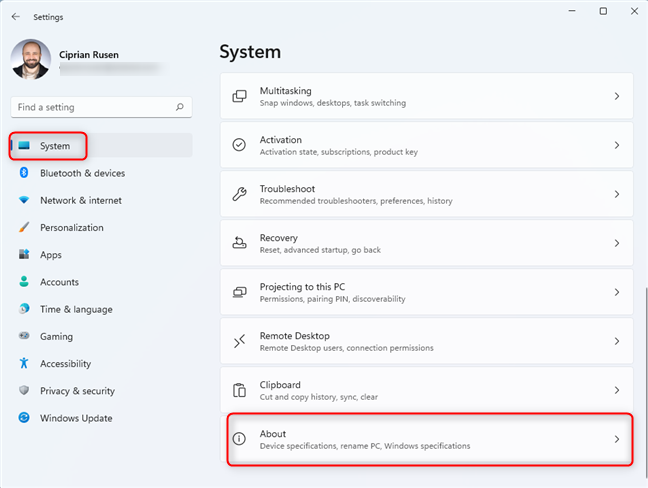
Go to System > About
Click or tap the “Rename this PC” option at the top of the About window.
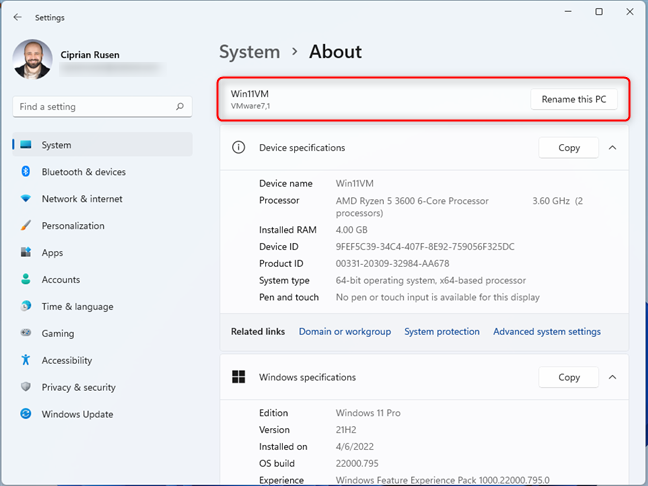
Click or tap Rename this PC
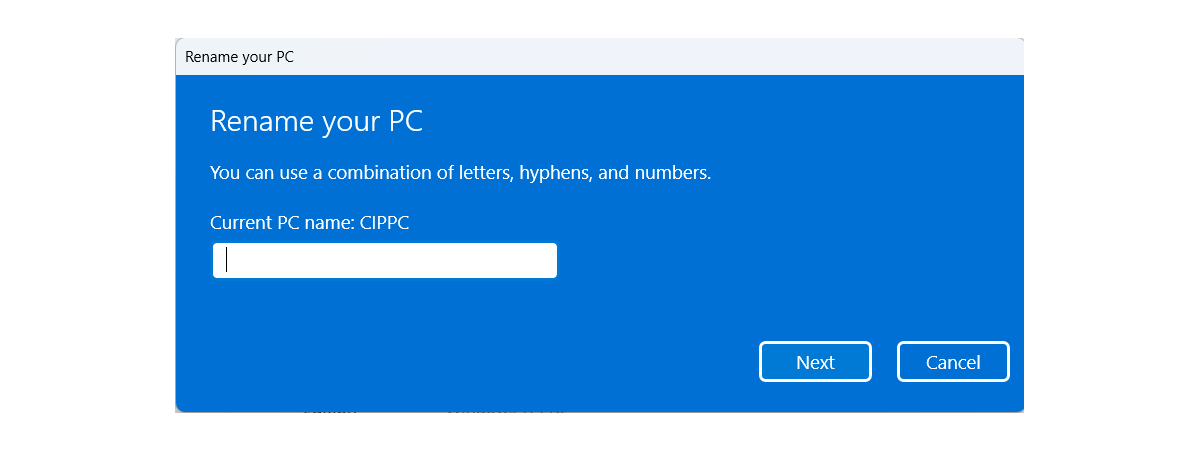
You see the Rename your PC dialog, where your present PC name is shown. Type the new name you want, and press Next.
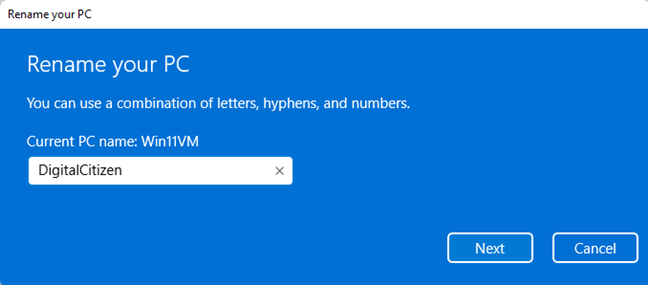
Enter the new computer name
To apply your change, you need to choose between Restart now or Restart later. If you want to Restart now, first make sure that you’ve closed all open files and apps so that you don’t lose your work.

Restart your PC to change its name
After your PC reboots and you sign in to Windows 11, your device name is changed.
3. How to change your Computer Name from CMD, PowerShell, or Windows Terminal
If you like command-line environments, you can open CMD as administrator, start PowerShell, or launch Windows Terminal. Then, type this command and press Enter on your keyboard:
Make sure to replace the text current_pc_name with your computer’s actual name and new_pc_name with the new name you want to use for it, similar to what I did in the screenshot below.
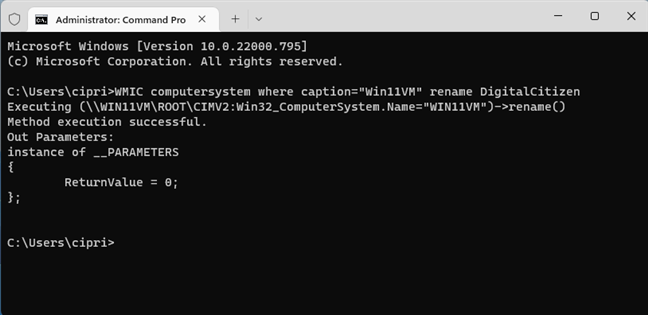
Change your Computer name from CMD
If all went well, you see a message that says: “Method execution successful.” After you restart your Windows 10 or Windows 11 PC, its name is changed.
4. How to change your Computer Name from PowerShell or Windows Terminal
Open PowerShell as admin or start Windows Terminal with administrator permissions, and run this command:
Don’t forget to replace New PC Name with the new name you want for your computer, similar to what I did in the screenshot below.
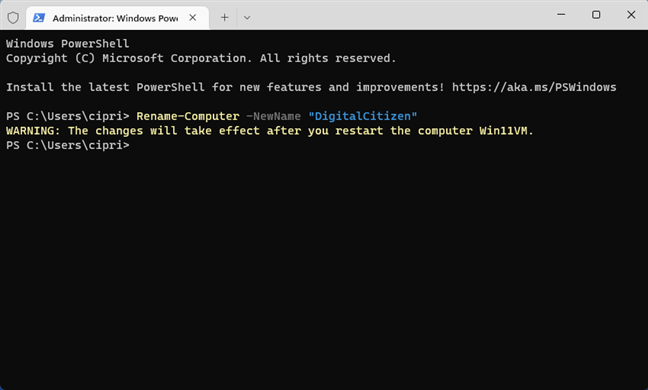
Change your Computer name from PowerShell
If all went well, you see a confirmation message that your changes will take effect after you restart the computer. This method works well in all versions of Windows that bundle PowerShell, including Windows 10 and Windows 11.
Which method do you prefer for changing your computer’s name?
Now you know many ways of changing any computer name, no matter which version of Windows it is running. Try them all out, see how they work, and let me know which one you like best and why. Would you rather use the Command Prompt for this task or the Settings app? Comment using the options below and share your opinion.


 09.08.2022
