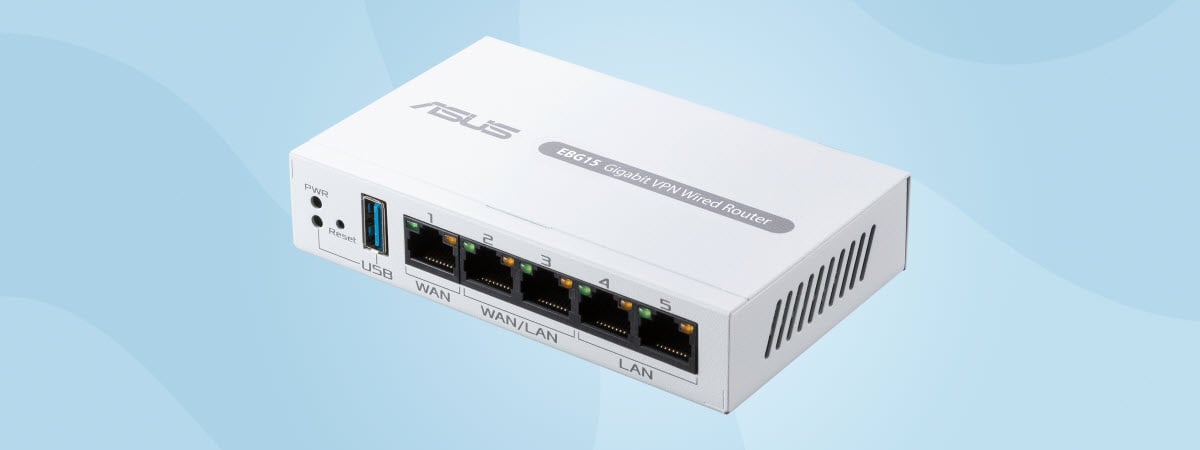
ASUS has a new family of networking devices. It’s named ExpertWiFi, and it includes routers, mesh systems, switches, and access points. Aimed at small and medium-sized businesses and organizations, these devices are all using Wi-Fi 6. And since businesses have different needs than home users, the company has also developed new firmware and mobile apps, which should make it easy for organizations to manage their networks. Two of the most important features developed for the ExpertWiFi lineup are Self-defined Network (SDN) and Scenarios Explorer. Here’s what they are, what they do, and how to use them:
What is a Self-defined Network (SDN) on ASUS ExpertWiFi?
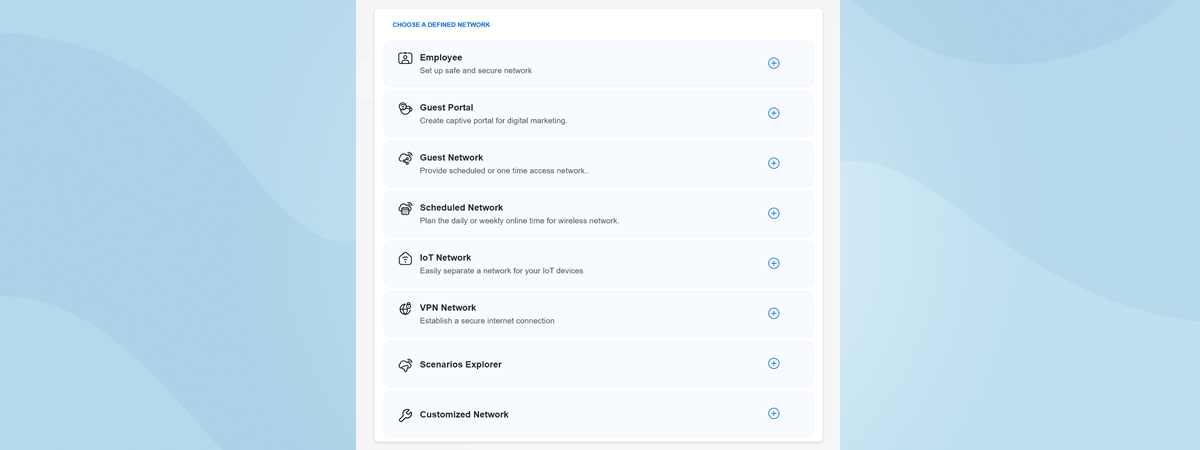
Self-defined Network or SDN is a new feature introduced by ASUS for its ExpertWiFi business networking devices. It helps companies and organizations easily set up and configure different network designs based on their needs. With SDN, you can create the following types of wireless networks:
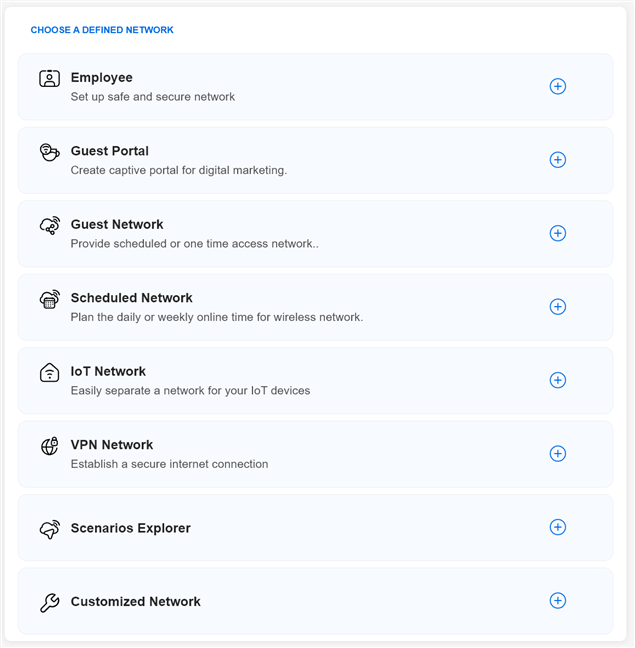
Self-defined Network (SDN)
- Employee - create a Wi-Fi network for your employees, with access to the company’s intranet. You can create a schedule for the network, set bandwidth limits, or even add services like automated VPN connections.
- Guest Portal - create a free Wi-Fi portal for your company’s clients in which you promote your company’s brand(s). You can set a custom background for the guest portal, redirect users to the company’s social media channels or website, and provide detailed terms of service. Security-wise, it’s great to separate the devices connected to the guest portal from the company’s intranet.
- Guest Network - create a Wi-Fi network for your customers or company guests with limited one-time access. For example, if you have a gym, you can create a Wi-Fi network that gives people access to the internet for one or two hours, with specific bandwidth limits and no access to the company’s intranet.
- Scheduled Network - create a network that emits its signal using a schedule for weekdays, weekends, or both. This may be useful for schools, universities, libraries, and other institutions where people go to learn. Your scheduled network can be available only during working hours and then disable itself automatically outside working hours.
- IoT Network - many institutions have tons of IoT devices in their network: wireless printers, scanners, surveillance cameras, sensors of all kinds, etc. For example, you can create a separate network from that of your employees, working only on the 2.4 GHz band, which is typically used by IoT devices, and even add a schedule to it, if required.
- VPN Network - set up a Wi-Fi network that automatically connects all devices to a specific VPN server, like the one used throughout your business. You can also create different VPN tunnels and rules through the VPN Fusion feature found on many ASUS routers and mesh systems. This feature allows different devices to connect automatically to different VPN servers based on your company’s needs.
Suppose all these choices are too technical for you. In that case, you can select Scenarios Explorer, choose the scenario that applies to your business, and have ASUS guide you in creating the appropriate Wi-Fi network for your scenario. Do you need to manage a restaurant, a hotel, a shopping mall, or a classroom? Based on your choice, the wizard recommends creating a type of Wi-Fi network setup or another.

Scenarios Explorer
The scenarios available are: employee, branch office, restaurant, hotel, coffee shop, shopping mall, gym, work from home, study, classroom, smart home, voice assistance, EV charging station, surveillance devices, children, and friends. You can find more details on how Scenarios Explorer works later in this guide. So keep reading until the end.🙂
Both the Self-defined Network and Scenarios Explorer are available for all ASUS ExpertWiFi routers and business mesh systems. I created this guide on an ASUS ExpertWiFi EBR63, but they work the same on the ASUS ExpertWiFi EBM68.
How to use the Self-defined Network and Scenarios Explorer from a web browser
Using the Self-defined Network (SDN) and Scenarios Explorer can be done both from a laptop or PC, using a web browser, or from the ASUS ExpertWiFi mobile app for Android and iOS. I’ll show you how to use both and start with the web browser.
First, log in to your ASUS ExpertWiFi using a web browser on your PC
Before you get started, you need to log in to your ExpertWiFi router or business mesh system. To do that, open a web browser on a computer connected to the network managed by your ExpertWiFi and navigate to expertwifi.net or the IP address of your router or mesh system.
Then, type the admin user account and password for your ExpertWiFi, and click or tap Sign In.
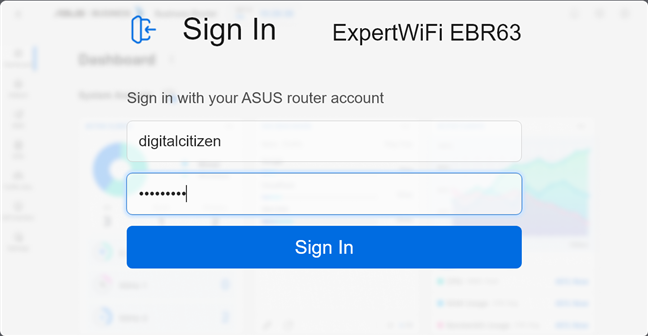
Sign in to expertwifi.net
Then, you see the Dashboard that should look similar to the screenshot below.
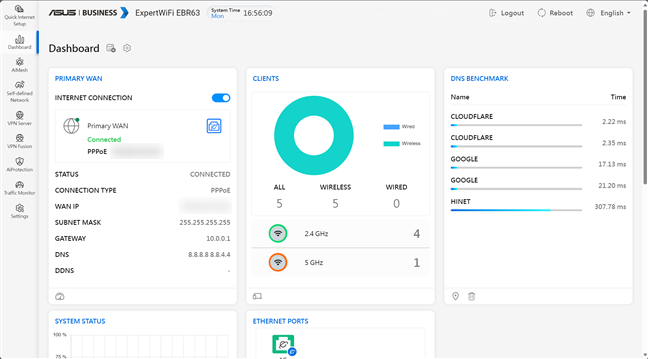
The ASUS ExpertWiFi dashboard
How to create a Self-defined WiFi network
In the left sidebar, click Self-defined Network. If this is your first time using it, you see a wizard on the right side of the screen, guiding you through the process. You are first asked to choose the type of network that you want.
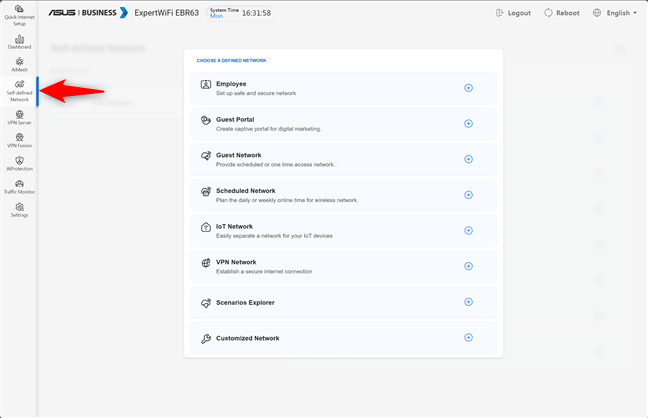
Go to Self-defined Network
Choose the type of network you want based on the information I’ve provided earlier in this guide. For this tutorial, I decided to create an Employee network.
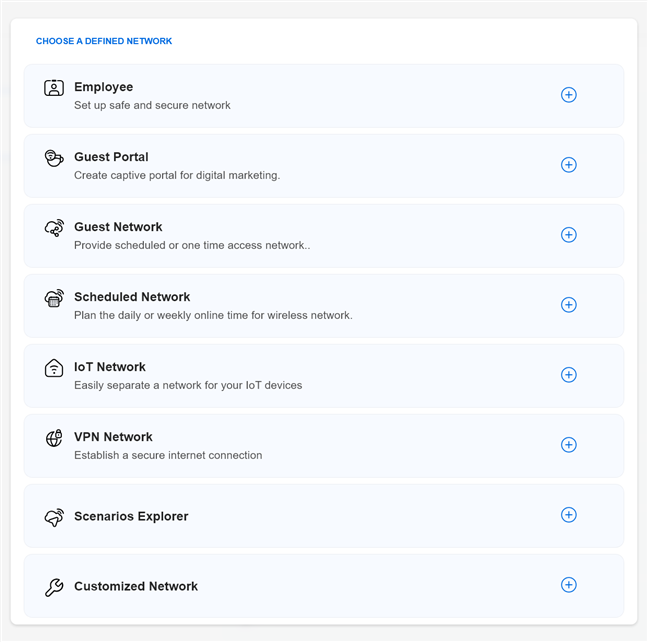
Choose the type of network you want to create
First, type the network name or SSID, and choose the type of security and Authentication Method you want.
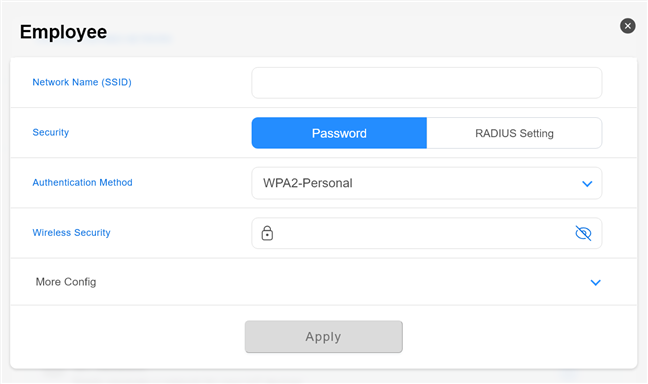
Creating an Employee network
For improved network security, it’s better to click or tap on the Authentication Method dropdown list and choose WPA2/WPA3- Personal instead of the default WPA2 protocols. WPA3 is newer, safer, and harder to crack by outside parties.
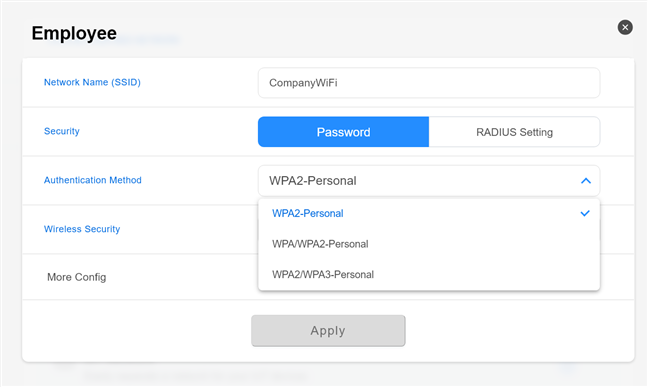
Choose the encryption
In the Wireless Security field, type the password that you want. Consider the evaluation made by the ASUS ExpertWiFi, which tells you whether you’re about to use a strong or weak password. Even if you use WPA3 encryption, a weak password remains a vulnerability.
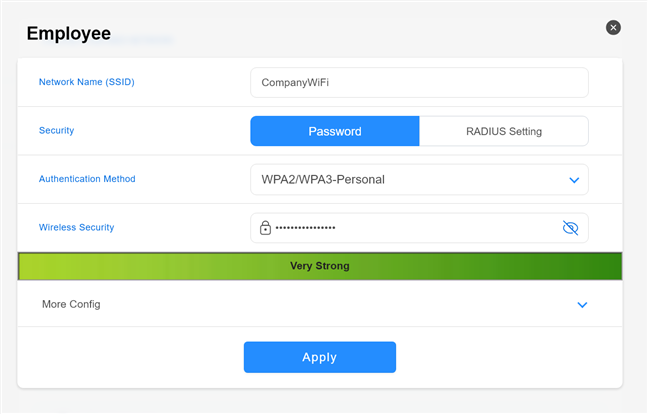
Is your password a strong one?
If you click or tap More Config, you can schedule when the Wi-Fi is emitted, set bandwidth limits, and verify that the Access Intranet switch is enabled. Since this will be the network your employees use, you probably want them to access other devices on the company’s network and share resources between them.
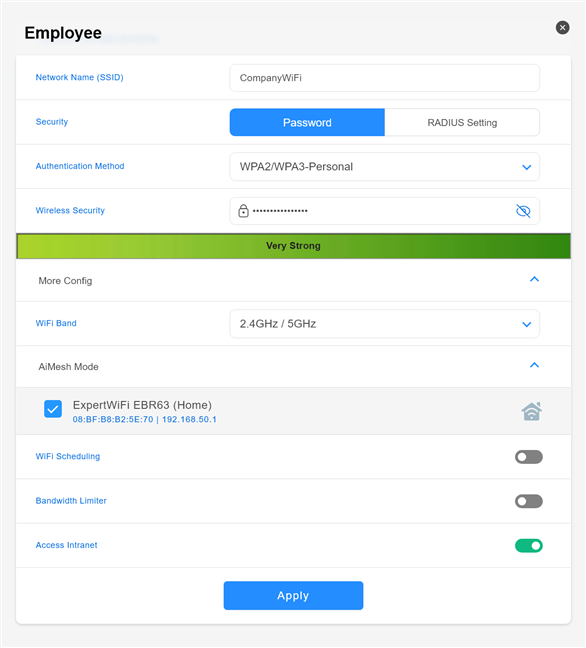
When you're done setting things up, click Apply
When you’re done setting things up, click or tap Apply and wait for your ASUS ExpertWiFi to create the employee network. You then see the newly created network in the Self-defined Network section, where you can turn it off or on and change other settings, like those related to VPN access.
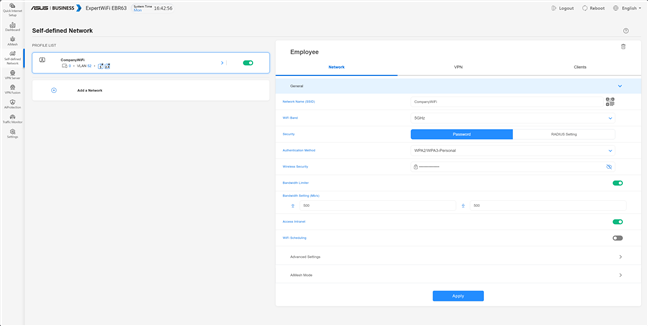
The self-defined network is created
If you want to create a new self-defined network, click or tap Add a Network and choose another type of network from the list.
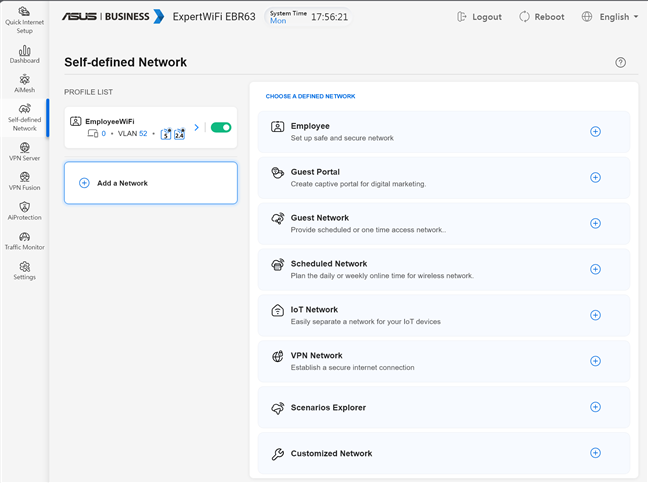
Click on Add a Network and choose another type of network
Then, complete the information requested by the firmware on your ASUS ExpertWiFi, hit Apply, and wait a couple of moments for your settings to be applied.
How to use the Scenarios Explorer
Suppose all the steps shared earlier seem too technical for you. In that case, you can also use the Scenarios Explorer, which chooses the best setup based on the scenario you provide. Here’s how it works: after you log in at expertwifi.net using the instructions shared earlier, go to Self-defined Network on the left. If you’re asked to choose a defined network, select Scenarios Explorer.
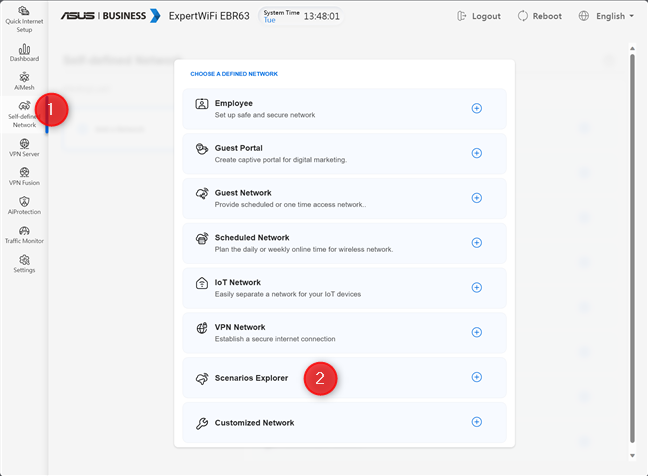
Go to Self-defined Network > Scenarios Explorer
If you don’t see the screen above, click or tap on Add a Network after accessing the Self-defined Network tab, and then choose Scenarios Explorer.
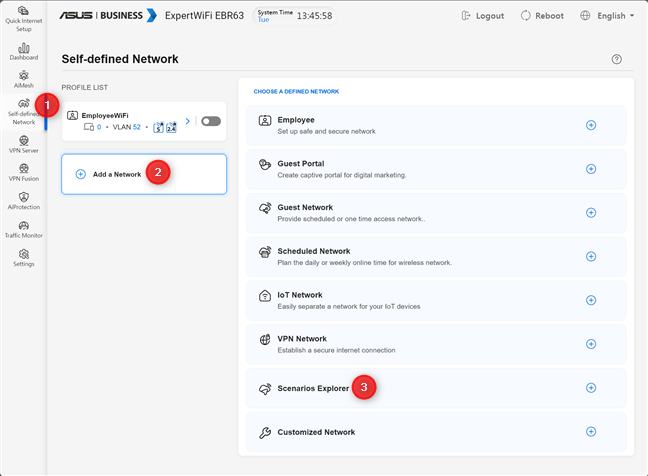
Click Add a Network and then Scenarios Explorer
Select the scenario that applies to your business. For this tutorial, I chose a Shopping mall.

Choose the scenario that applies to your organization
The wizard then proposed creating a guest network with temporary one-time access for the people visiting the shopping mall. I typed the network name (SSID), opted to leave it as an Open System (meaning a network without a password that’s easily accessible to anyone entering the shopping mall), and then chose how much time I wanted to give access to the WiFi and the internet, for each device.
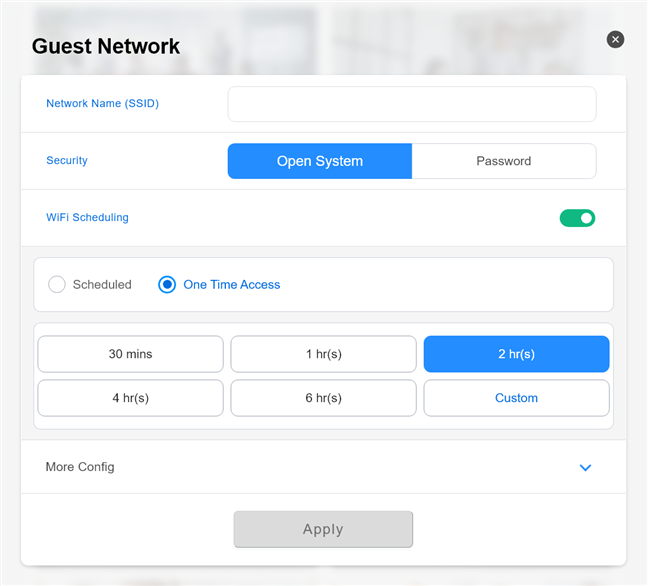
Creating a guest network with one time access
If you press More Config, you can access a few other options. For example, you can broadcast this network only on the 2.4 GHz band to provide maximum coverage and set bandwidth usage limits to prevent visitors from abusing the network. I was happy that the wizard automatically blocked intranet access for this type of network, which is exactly what you want for an open WiFi network used by people visiting a shopping mall.
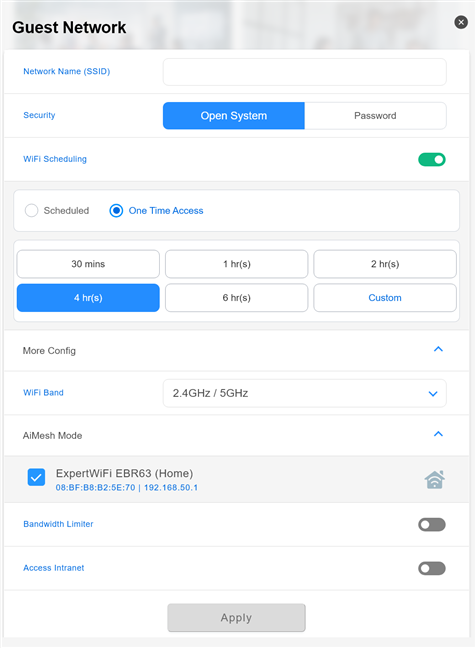
More Config provides more options
When done setting things up, click or tap Apply and wait for a couple of moments until your ASUS ExpertWiFi creates the network. It then appears in the Self-defined Network section of its firmware, and people can start using it.
How to use the Self-defined Network and Scenarios Explorer from the ExpertWiFi mobile app
ASUS provides a new ExpertWiFi app for Android and iOS. You don’t have to get access to a computer to manage your network; you can use the ExpertWiFi app from anywhere on the internet. In this section, I show you how to use the app to create a Self-defined network and how to access Scenarios Explorer through the app.
How to create a Self-defined WiFi network from the ASUS ExpertWiFi app
After you log into the ASUS ExpertWiFi app on your smartphone and connect it to your ExpertWiFi router or mesh system, you can use it to create a Self-defined network. To do that, open the app and tap SDN at the bottom of the screen.
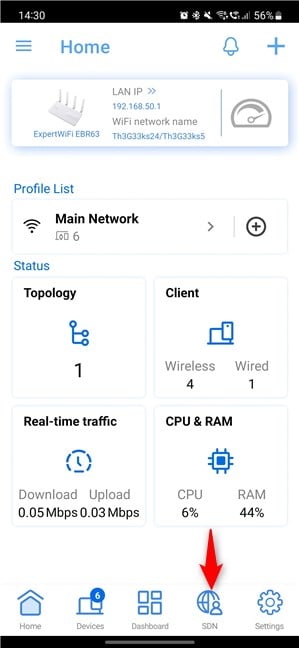
In the ExpertWiFi app, tap SDN
You see a list of choices for creating the Self-defined network. Choose the one that fits your needs. For this tutorial, I chose IoT Network, which is suitable for companies with many IoT devices on their premises. Such businesses may have on their premises many sensors, surveillance cameras, smart meters, smart alarms, etc.
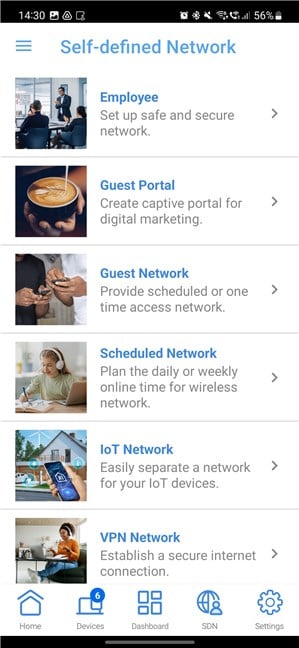
The list of self-defined networks
The wizard then asks you to type a name and password for the network. Pay attention to the password evaluation made by the app, and don’t choose a weak password to secure your network. It will be a lot easier to crack by unwanted parties.
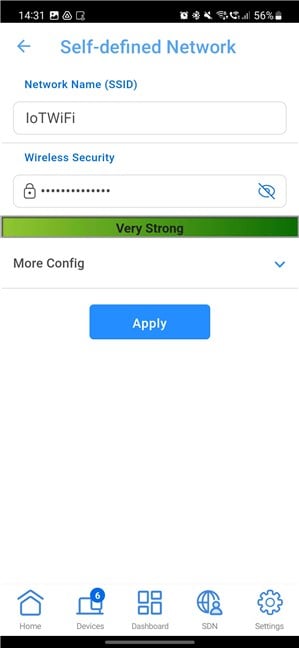
Creating a self-defined network
If you tap More Config, you see additional details, like this network will use only the 2.4 GHz band, which is perfect for IoT devices. You can also create a schedule, if you need one. When done setting things up, hit Apply.
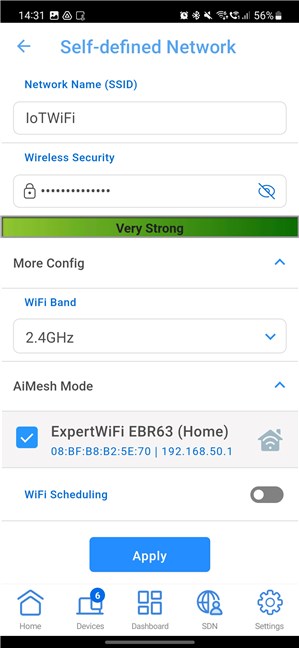
More Config reveals more details
After a few seconds, your ASUS ExpertWiFi router or mesh system creates the network. You then see it in the SDN section of the ExpertWiFi app.
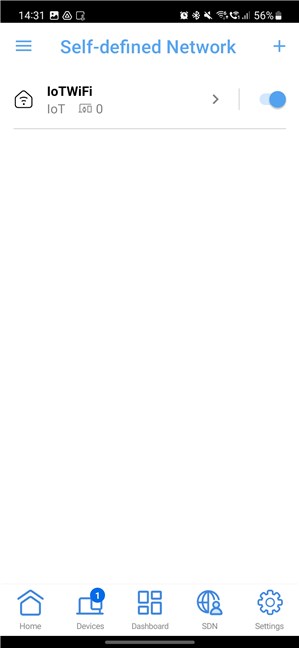
The network was created
You can disable the network from here, edit its settings, or even delete it when you no longer need to use it.
How to use the Scenarios Explorer in the ExpertWiFi app
If you want to use the Scenarios Explorer instead, open the ExpertWiFi app, go to SDN, scroll down the list, and choose Scenarios Explorer.
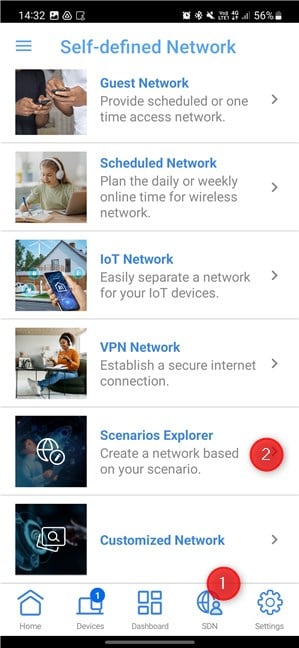
Choose Scenarios Explorer
If you don’t see the list of options above after you tap SDN, but you can see one or more self-defined networks, tap the + (plus) sign on the top right.
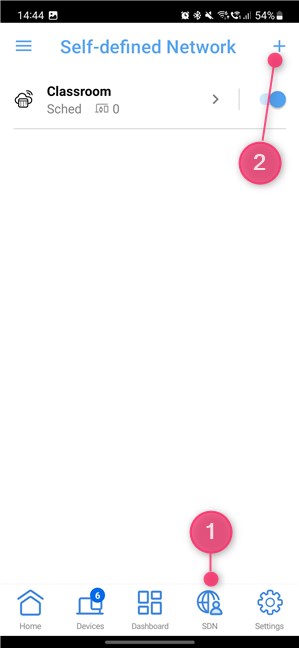
Tap the + (plus) sign on the top-right
You now see a list of scenarios to choose from. Scroll down the list and choose the one that applies to your organization. For this tutorial, I chose Classroom, which should fit the needs of a learning institution like a high school or general school.
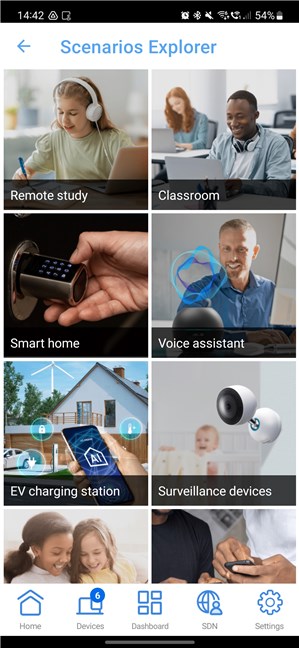
Choose your scenario
The wizard automatically creates a network that can be set to function only on weekdays, weekends, or both, with a different schedule for each. Type the name you want for the network and its password.
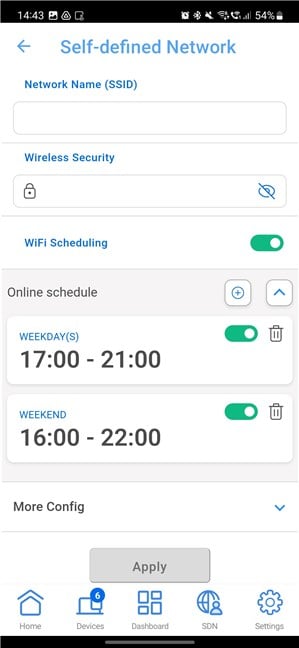
Creating a network with a specific schedule
Then, in the Online schedule section, choose the days and time slot(s) when you want it to broadcast its wireless signal. When you are happy with the choices you’ve made, tap Apply.
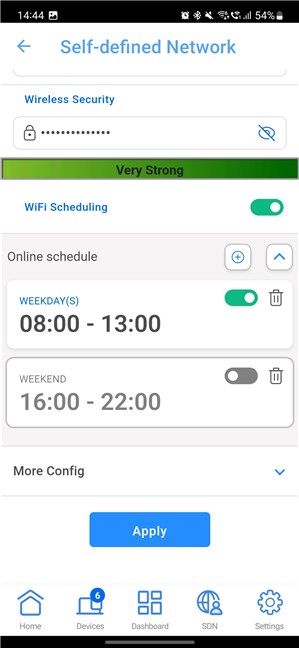
When done setting it up, tap Apply
The network is created in a couple of seconds and then shown in the SDN list.
How do you like the Self-defined Network?
The Self-defined network feature will be highly useful if you have an ASUS ExpertWiFi router or business mesh system. And now you have the perfect guide to help you through setting things up in just a couple of seconds. Try it out, see how it works, and if you have any questions, don’t hesitate to comment using the options below.


 29.09.2023


