Mesh Wi-Fi systems are not new, and most people know what they are. However, few people know that they can use traditional wireless routers to create their own mesh Wi-Fi systems. For example, if you have an ASUS router, you can purchase a second one and set them up to work as a mesh Wi-Fi system using AiMesh. If you want to know more, read this article and find out what ASUS AiMesh is and how to create an AiMesh network on your own:
What is an AiMesh network?
ASUS AiMesh is an innovative feature that allows multiple ASUS routers to create a mesh Wi-Fi network. You can mix different models of ASUS routers: older and cheaper Wi-Fi 5 routers, new Wi-Fi 6 routers, and mesh Wi-Fi systems made by ASUS like the new ZenWiFi line-up. One of them will be the main node (or the Master if you’d like), managing the internet connection and all the network settings, while the others are secondary nodes cloning the settings they receive from the primary one. An AiMesh network has the following advantages:
- It allows you to reuse older ASUS Wi-Fi 5 routers to increase the wireless coverage in your living space or workplace;
- You get the same advanced features and capabilities on all ASUS routers and devices that are part of the AiMesh network;
- You can set up a dedicated backhaul (through Wi-Fi or Ethernet) for increased speed throughout the network.
The downside is that AiMesh works only with ASUS routers and mesh Wi-Fi systems. You can’t build an AiMesh network using routers from other manufacturers.
If you want to get an idea of the performance improvements you can expect from using ASUS AiMesh, I recommend this older analysis I ran a couple of years ago: How fast is the Wi-Fi when you create your own ASUS AiMesh?.
What do you need for an AiMesh network?
To set up an ASUS AiMesh whole-home Wi-Fi system, you need the following:
- Two or more ASUS routers or mesh Wi-Fi stations with firmware that supports AiMesh;
- Enable WPS on the primary ASUS router that is going to manage the AiMesh network, as WPS is used to send the configuration details to the secondary nodes during the setup process;
- The best router for the primary AiMesh node is the most powerful you have available. Set that one first;
- The main ASUS router should first be configured to work the way you want, so that the AiMesh nodes you add clone its settings;
- The secondary nodes in the AiMesh should be reset before adding them. If you don’t know how, read: How do I reset my ASUS router to its factory settings?
- Ideally, all AiMesh devices should have the latest firmware installed before setting up the whole system to minimize the possibility of encountering connection issues during the setup process.
Which routers are compatible with AiMesh?
The list of ASUS routers with support for AiMesh increased every month. Therefore, we recommend you to check the Line-Up section from this official page: What is AiMesh?.
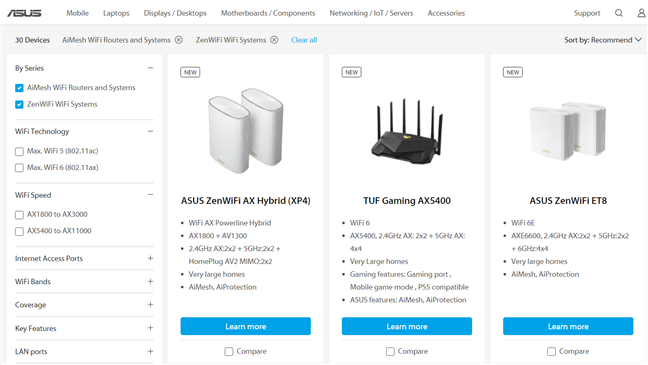
Routers compatible with AiMesh
From our testing experience with ASUS routers, all Wi-Fi 6 routers made by the company should have AiMesh support, and so should most mid-range and premium Wi-Fi 5 routers from ASUS.
If you’re looking for the cheapest AiMesh router, take a look at:
- ASUS AC2900 WiFi Gaming Router (RT-AC86U) - a Wi-Fi 5 router that costs just a bit less than 100 USD;
- ASUS AX1800 WiFi 6 Router (RT-AX55) - the only ASUS Wi-Fi 6 router with a price-mark of around 100 USD. I highly recommend buying it instead of an older Wi-Fi 5 router. You’ll benefit from modern hardware, Wi-Fi 6, and the ability to handle more network devices than previous models.
How to create an ASUS AiMesh network from your PC
On a PC connected to the ASUS router that will be the primary node in the AiMesh network, open your favorite browser and log in to router.asus.com. Enter the username and password of your specific router, and press Sign In.
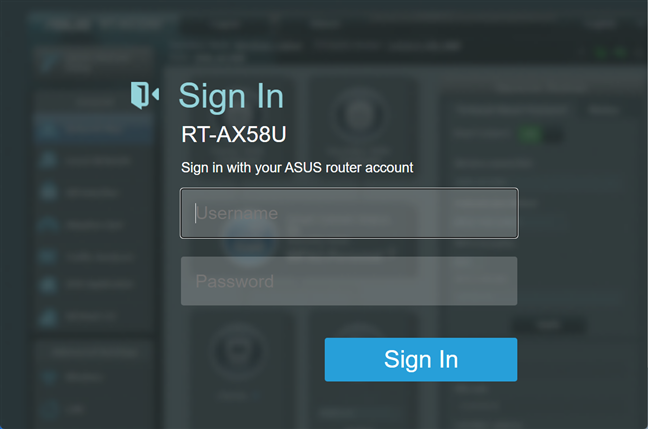
Log in to the main ASUS router
NOTE: For more detailed information about logging into your ASUS router, read: How to login to your ASUS router.
Ensure that the ASUS routers you want to add to the AiMesh network are turned on, reset to their factory defaults, and placed somewhere close to your primary router. Then, in the administration user interface, choose AiMesh on the left, and click or tap Add AiMesh Node on the right.
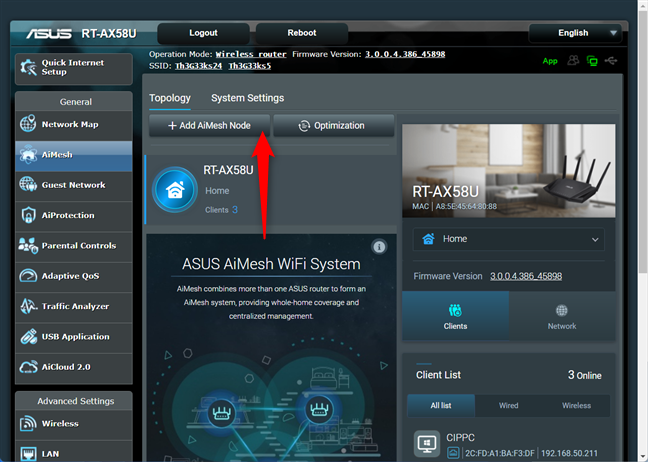
Click AiMesh and then Add AiMesh Node
Your primary ASUS router searches for available AiMesh nodes nearby and lists them. Then, click or tap on the one you want to add.
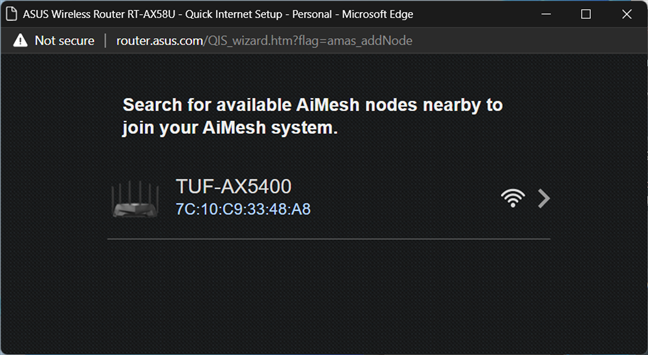
See available AiMesh nodes
TIP: If you can’t see your ASUS router in the list of available nodes, place it closer to the primary router, make sure that it’s turned on, with the latest firmware installed, and reset to its factory defaults.
You are asked to confirm adding the select ASUS router as a node to your AiMesh system. Click or tap Connect.
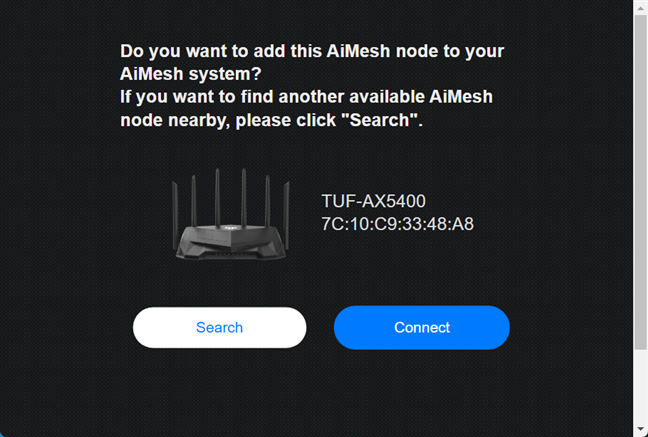
Click on Connect
Both ASUS routers spend a couple of minutes communicating, migrating the necessary settings from the primary router to the secondary one. When this process is over, you are informed that the selected router was successfully added to your AiMesh system. You can press Finish when you are done adding routers to AiMesh, or hit Search to add the next one.
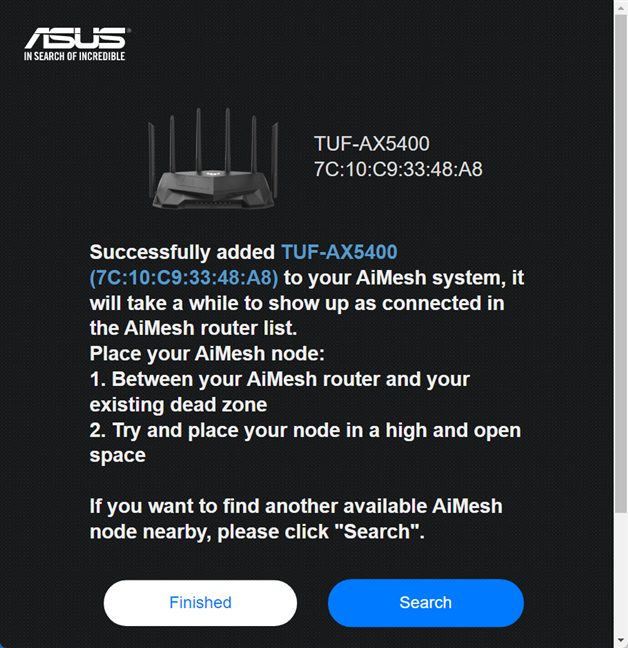
The selected router is now added to the AiMesh network
When you are done, you see all the ASUS routers lists in the Typology tab, just like in the picture below. You see the name of the main ASUS router on the top and then the names of the other routers you’ve added to AiMesh.
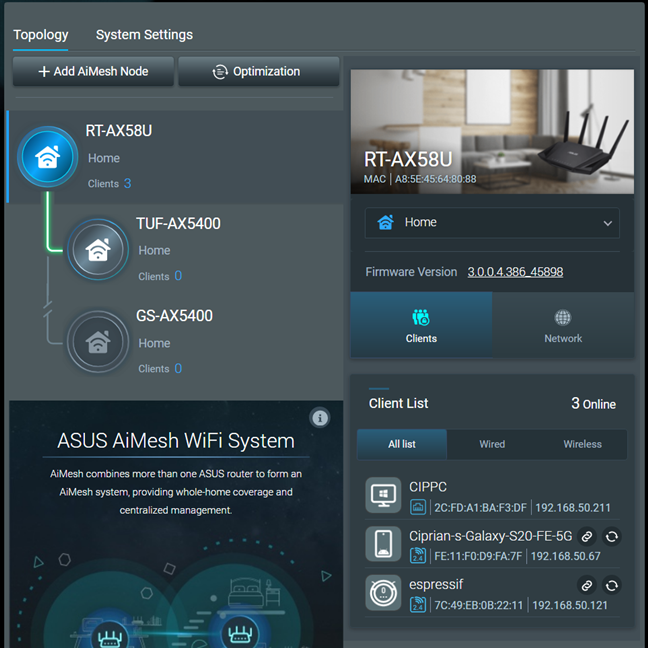
The topology of your ASUS AiMesh network
The ASUS AiMesh network is now created. You can then move the ASUS routers to the locations you want to maximize your Wi-Fi coverage and finetune your network settings on the primary router. After you’ve chosen the locations you want for all nodes, it is a good idea to click or tap the Optimization button in the AiMesh tab, so that your routers reconfigure themselves optimally and give you the best performance.
How to create an ASUS AiMesh network from the ASUS Router app
If you have a smartphone or a tablet with the ASUS Router app installed, open the app and connect it to the primary ASUS router. Then, go to Settings and tap on AiMesh.
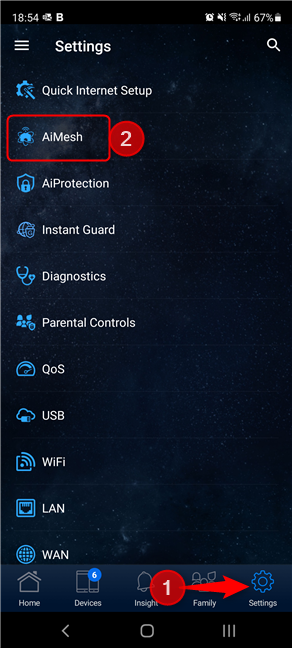
Tap Settings and then AiMesh
To add the secondary nodes to your AiMesh network, tap on Get Started.
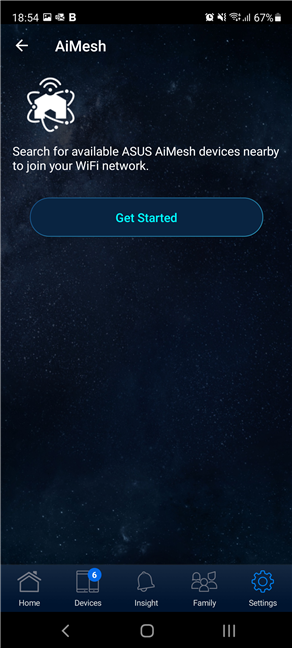
Tap on Get Started
The ASUS Router app looks for devices to join AiMesh, and lists them. Tap on the name of the router you want to add.
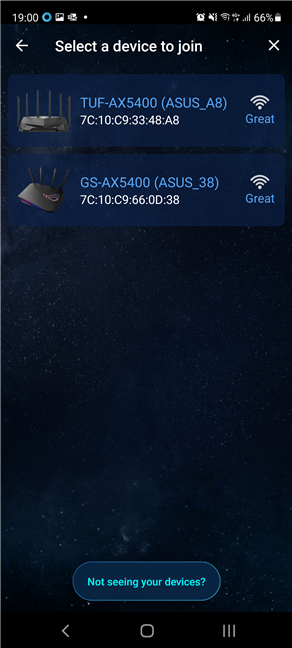
Tap on the name of the router you want to add
TIP: If you can’t see your ASUS router in the list of available nodes, place it closer to the primary router, ensure that it is turned on, with the latest firmware installed, and reset to its factory defaults.
You are then asked to choose the location of your router. Next, tap on Home and select something else from the list, if you want to. Then, tap Apply.
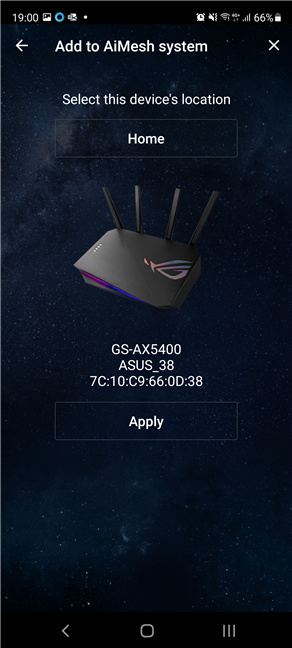
Choose the location and tap Apply
Your primary router then connects to the node you selected and, in the next couple of minutes, it sends the necessary configuration. Wait for about 3-4 minutes for the process to be finalized.
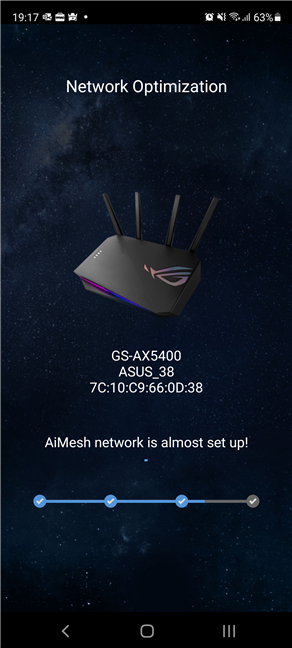
Wait for the ASUS router to be added to AiMesh
When the router you selected is added to the AiMesh network, you are informed. Then, you can tap Done and close the ASUS Router app, or tap “Add another node” and repeat the process with another router.
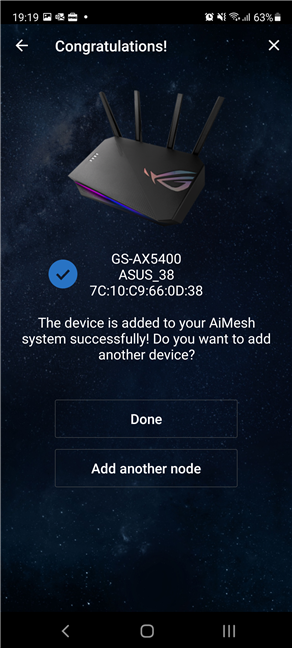
The ASUS router has been added to AiMesh
The ASUS AiMesh system is now created. You can then move the ASUS routers to the locations you want, to maximize your Wi-Fi coverage and finetune your network settings from the ASUS Router app.
How do you like your ASUS AiMesh network?
Now you should have your ASUS AiMesh system live and working. If you’re not happy with the initial results, change the location of your ASUS routers and tweak their settings. The network should work better than when using only one router. Before closing this tutorial, tell us if you have any questions or encountered problems during the setup process.


 27.10.2021
