Did you know you can get into your Microsoft account without inserting a password? The Microsoft Authenticator app lets you enable two-step verification for your Microsoft account. You can then use your Android smartphone or tablet to approve or deny sign-in requests. Read our guide to find out how to get the Microsoft Authenticator and how to use it to sign in faster from your Android:
NOTE: This guide shows the Microsoft Authenticator setup on Android to help with your Microsoft account login. You can first learn more about two-factor authentication. Alternatively, you can also use Google Authenticator to sign in to your Microsoft account.
Step 1: Get the Microsoft Authenticator app from the Google Play Store
First, you must download and install the Microsoft Authenticator on an Android smartphone or tablet. Follow this link to get the app from the Google Play Store.
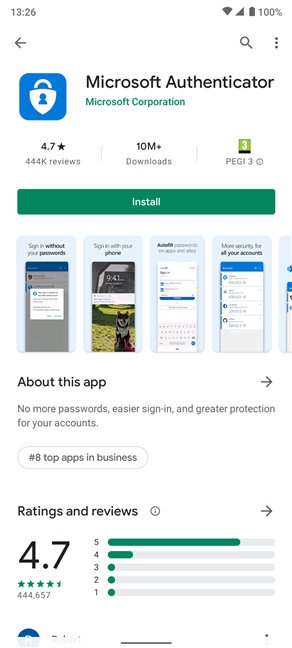
The Microsoft Authenticator app in the Google Play Store
If you need further help during this step, check out our guide showing how to install apps from the Google Play Store.
Step 2: Start the Microsoft Authenticator on Android
When the app is installed, press Open to launch it from the Google Play Store.
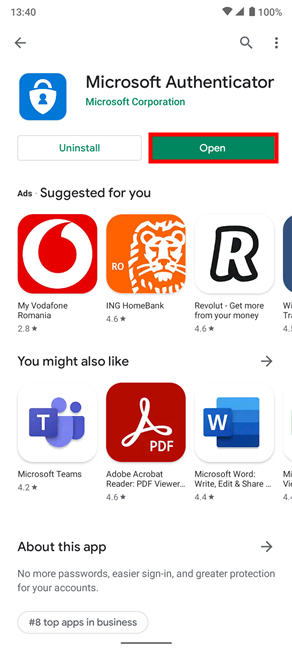
Open the Microsoft Authenticator app from the Play Store
Alternatively, you can also swipe up on your Home screen to access the All Apps screen.
Look for the Microsoft Authenticator icon highlighted below. Then, tap on it to launch the Microsoft Authenticator app.
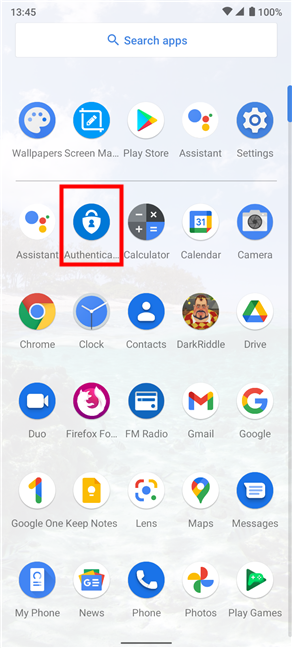
Launch the Microsoft Authenticator on Android from its icon
Step 3: Set up Microsoft Authenticator with your Microsoft account
When you first launch the app, you are prompted to allow Microsoft to collect data from your Android device. Since there is no way around this if you want to complete the Microsoft Authenticator setup, press I agree.
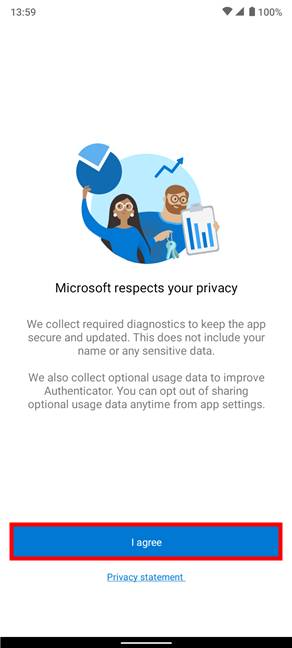
Tap I agree to continue
Next, press “Sign in with Microsoft”, to add the Microsoft account that you want to use with this app. Later on, you can set this account to back up all your two-step verification accounts in Microsoft’s cloud, allowing you to recover them with ease when you change your smartphone.
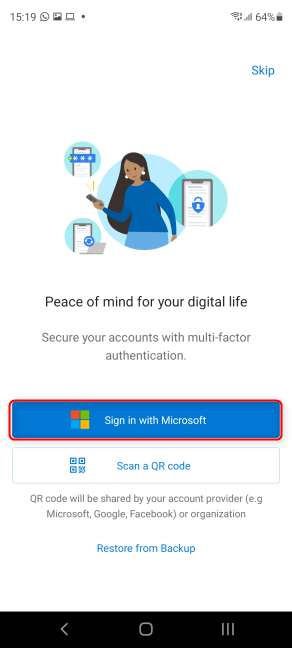
Press Add account to start the Microsoft Authenticator setup
You are asked to type the email address, phone number, or Skype name associated with your Microsoft account. Once you’re done, press Next.
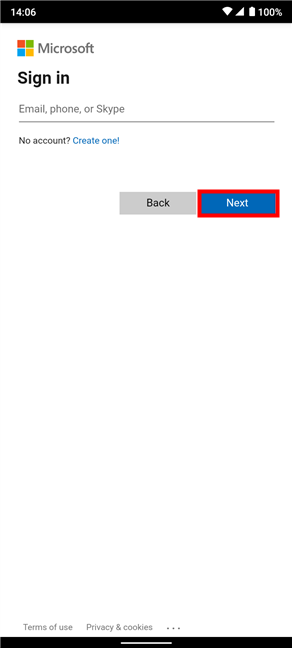
Insert the required details to sign into your Microsoft account
Type your Microsoft password in the corresponding field, and then press the Sign in button.
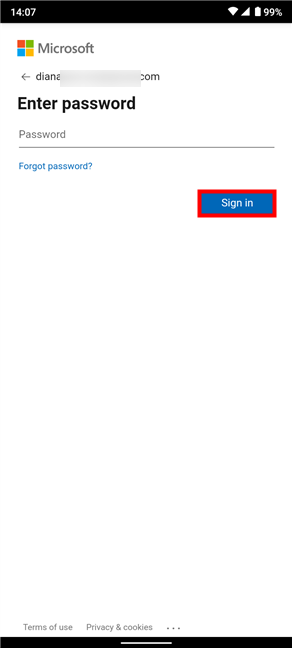
Insert your Microsoft password
Next, Microsoft requires you to verify your identity. This screen could look different, depending on the account protection options you chose. We sent an email to the address associated with our Microsoft account by pressing the option called Email (followed by our email address), but you may send a text message to your phone number, or use the same Microsoft Authenticator app on another device.
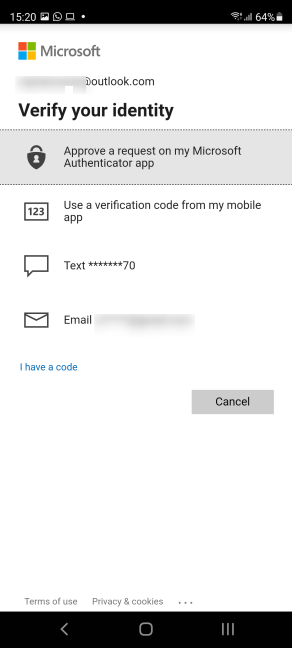
Verify your identity by tapping the preferred method
Depending on the option you choose, the app requests you to manually enter the email address associated with your Microsoft account, or the last four digits of your phone number (if you chose to verify your identity via text). We checked our email for the security code and inserted it on the next screen. Follow the instructions and press Verify.
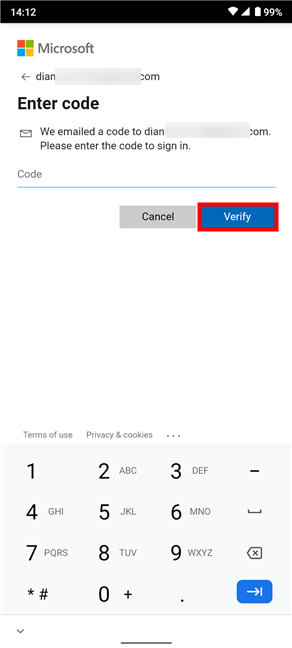
Verify your identity to set up Microsoft Authenticator
Next, you get to the “Welcome to phone sign-in!” screen. Press Got it.
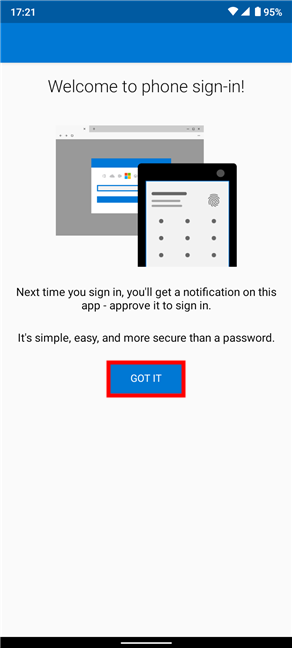
Tap the Got it button
App Lock is enabled by default to protect the app and the sensitive data stored by it, which means you need to unlock Microsoft Authenticator whenever you access it, using your fingerprint, the PIN you set for your Android smartphone, or other methods that work for unlocking your device. Press OK.
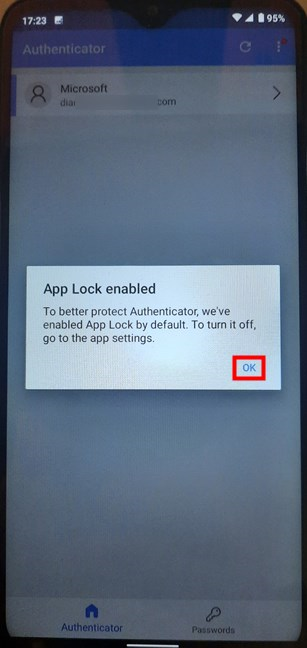
Tap OK to finish the Microsoft Authenticator setup
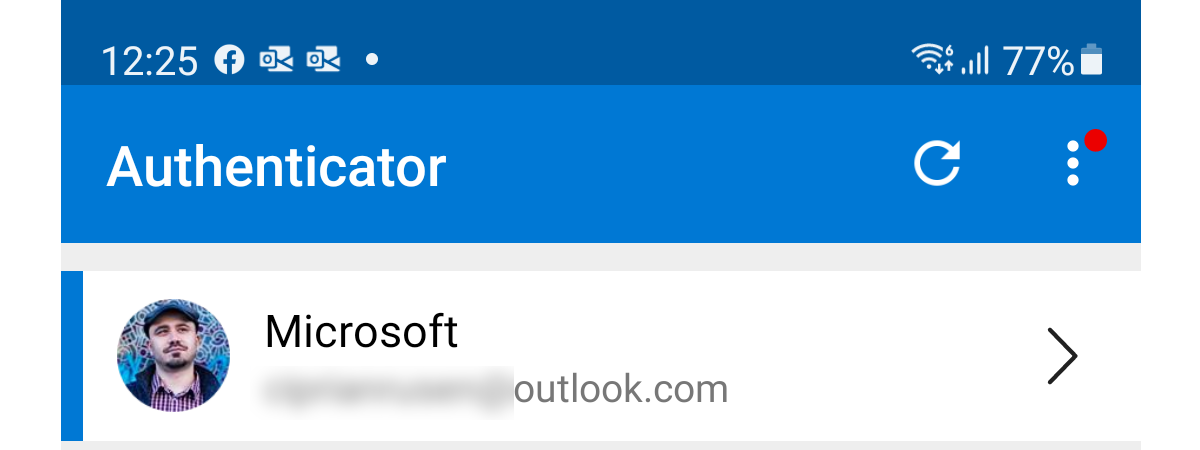
You have now set up the Microsoft Authenticator on Android. You can see your Microsoft account listed at the top of the main screen and add as many accounts as you want for two-step verification. In the screenshot below you can see that our chief editor uses this app for everything from Facebook to his Epic Games account. 🙂
If you want to add another account to the Microsoft Authenticator app, press the three dots button in the upper-right corner of the screen, and then tap “Add account” to begin the whole process.
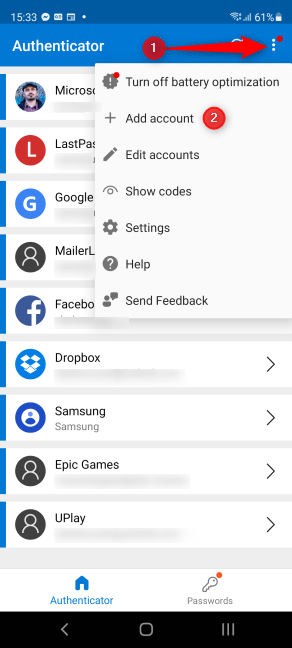
How to set up Microsoft Authenticator to use another account
Step 4: How to get into a Microsoft account without a password with Microsoft Authenticator
Now let’s see how you can use the Microsoft Authenticator to approve a sign in request from your Android smartphone. The next time you try to connect to your Microsoft account, you may no longer be prompted for your password. Instead, you get a message to check the Microsoft Authenticator app, like the one we got in our browser, seen below.
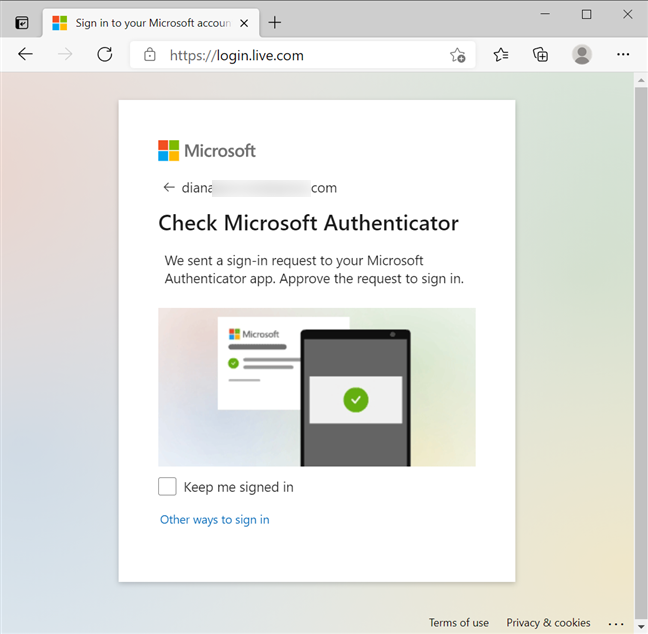
How to get into a Microsoft account without password
The Microsoft Authenticator app shows a notification on your Android smartphone. Tap on it to reveal more options.
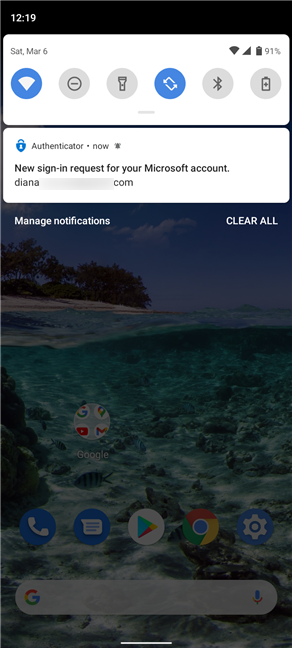
Press on the notification from Microsoft Authenticator to approve a sign in request
The notification expands into a pop-up window. To avoid confusion, the location and operating system where the request originated are shown under your account. Approve the sign in request by tapping on Approve.
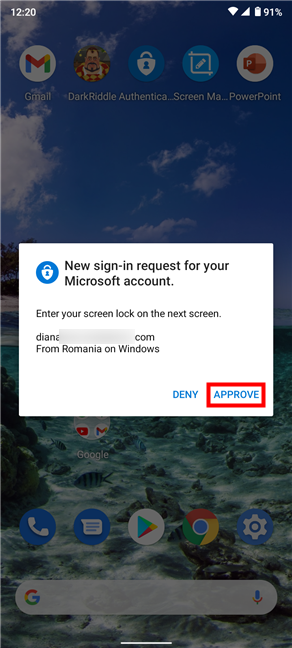
On your mobile device, approve the request to sign in
Since App Lock is enabled, you are prompted to unlock Microsoft Authenticator using the PIN, fingerprint or other unlock mechanism you have set for your Android device. As soon as you do that, you are signed in automatically, so you can put your Android away and carry on with whatever you were doing on the new device.
If you get a sign-in request you don’t recognize, press Deny.
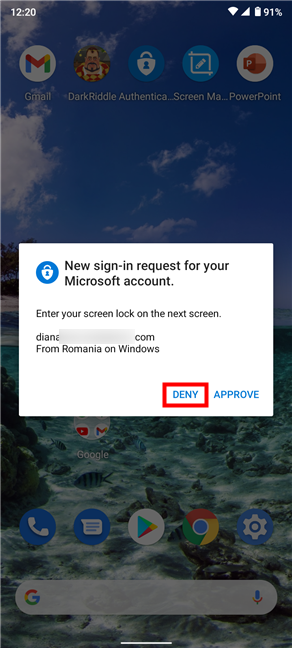
Tap on Deny if you didn't initiate the sign-in request
When a Microsoft Authenticator request is denied, the person trying to sign in to your Microsoft account receives the message below.
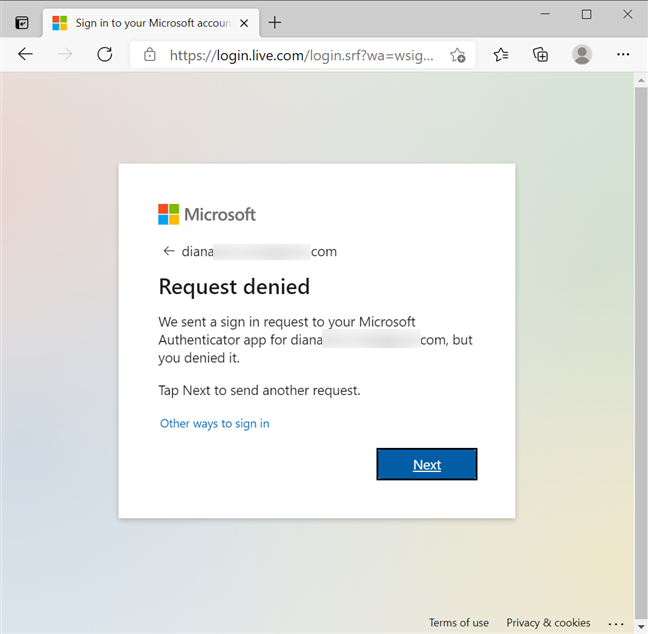
Microsoft Authenticator request denied
TIP: If you get suspicious sign-in requests, it’s safer to change your Microsoft account password immediately.
Do you like the Microsoft Authenticator app?
The Microsoft Authenticator app lets you sign into a Microsoft account without a password, saving you precious time. This is very helpful, especially if you need to access your Microsoft account often, as we do. Before you close this page, let us know if you enjoy this new way of logging into your Microsoft account. Don’t you think it makes your sign-ins faster? Share your opinion in the comments below.


 09.03.2021
