If you know you’re going to travel in an area where mobile internet is unreliable or where data usage is costly, you may want to download offline maps in Apple Maps on your iPhone. Offline maps let you view the map and get directions without being connected to the internet. Sounds interesting? In this guide, I will show just how easy it is to download and use offline maps in Apple Maps on your iPhone:
NOTE: Offline maps were introduced with iOS 17, so if you have an older version of the operating system, you’ll have to update your iPhone to get access to this feature.
How to download offline maps on an iPhone
Before you go offline, you need to download the map data of the area you want to visit. To do this, first open the Maps app on your iPhone.
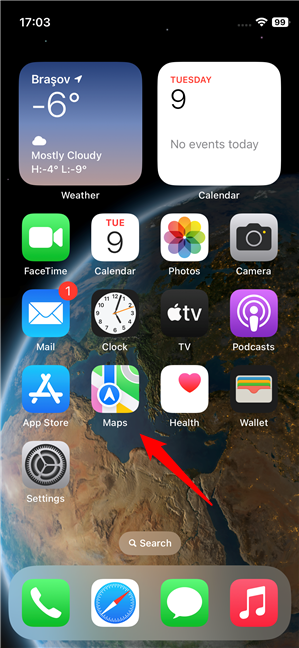
Open Apple Maps on an iPhone
In Apple’s Maps app, search for the location or area you want to download. You can do that by tapping the Search Maps text field at the bottom of the screen and then entering the name of the place you’re interested in. Once the search results are listed, tap the one you need.
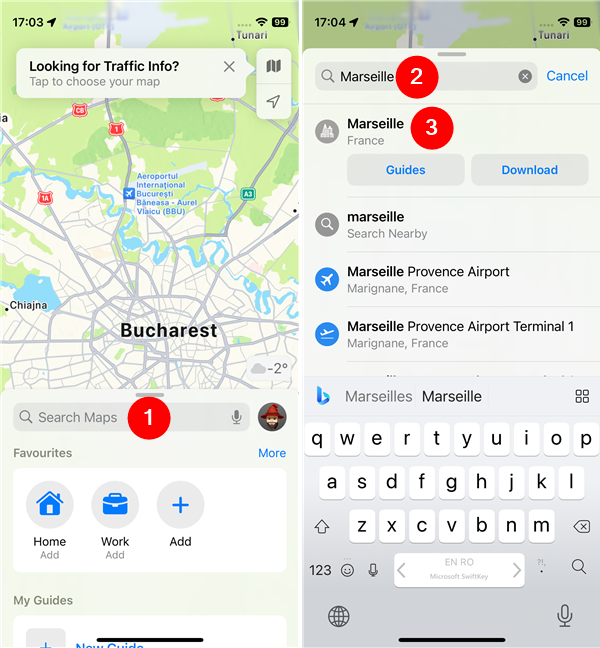
Search for a place in Apple Maps
The Maps app will take you to the location you’ve selected. In the location box at the bottom of the screen, you’ll find a button called Download. Tap on it.
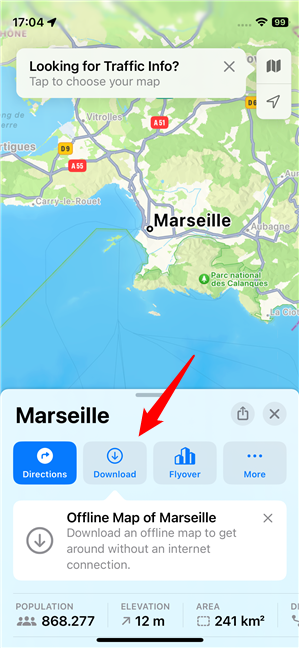
Tap the Download button to get the offline map
The previous action will load a new screen where you can see the map of the location. Your iPhone automatically selects a size for the offline map, but you can zoom in or zoom out if you need to enlarge it or reduce its size. Once you’ve selected the entire area you want the offline map to contain, tap the Download button. Also, pay attention to the size of the selected map so that it’s not too large, leaving you with insufficient space for storing pictures, videos, and other items.
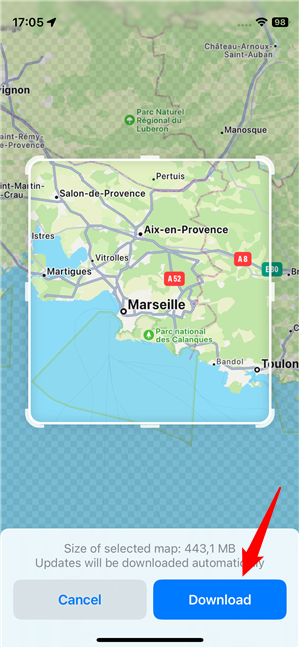
Adjust the size of the map and tap Download
After you tap Download, your iPhone starts saving the map. Depending on the size of your map and how fast your internet connection is, you may have to wait for a while for the data to download.
During this time, you can monitor the progress on the location box at the bottom of Apple’s Maps. By the way, if you change your mind, you can also pause or cancel the download by tapping on the same button.
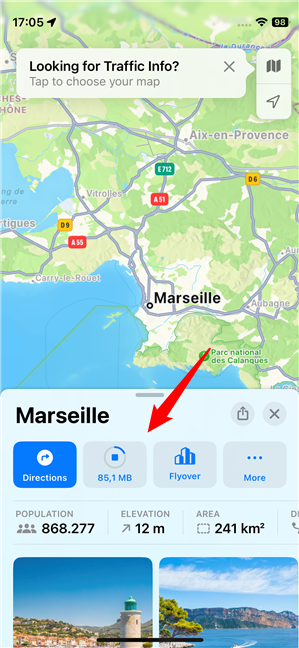
Wait for the offline map to download
When all the map data has been saved on your iPhone, Apple’s Maps will let you know about it by displaying an “Offline Map Downloaded” message at the top of the screen. Furthermore, the Download button in the location box at the bottom of the screen will change its name to Offline.
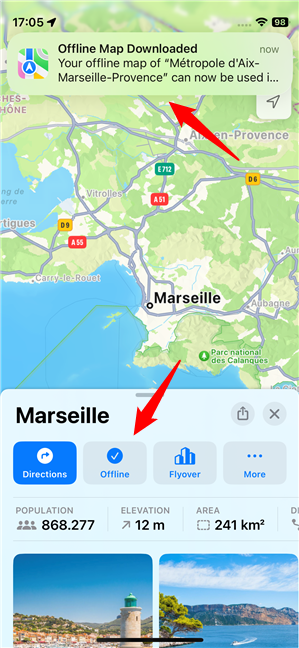
The offline map has been downloaded on your iPhone
You can now start using the offline map you got on your iPhone. Here’s…
How to use offline maps on an iPhone
Once you have downloaded the offline maps, you can access them anytime without an internet connection. There’s really nothing special about it: just use the Maps app as you would normally do. The only indicator that you’re using offline maps is a small “Using Offline Maps” tip at the top of the screen.
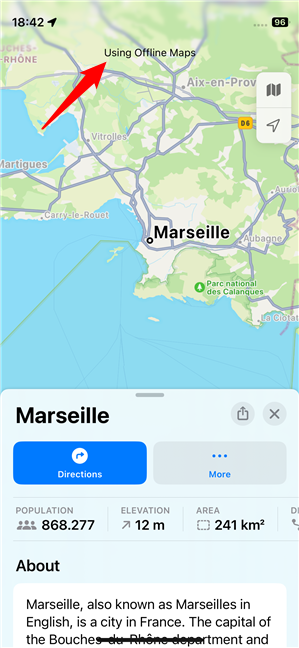
Using Offline Maps in Apple Maps
If you zoom out, you’ll also get to see just how much of the area displayed is saved in the offline map you downloaded.
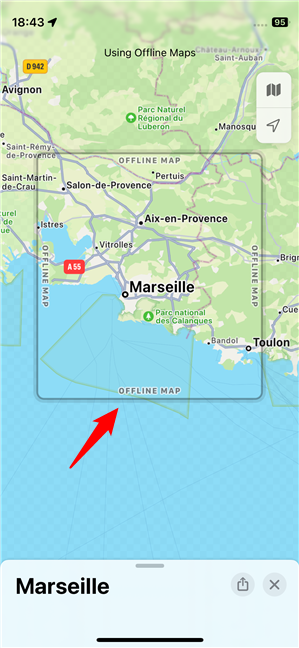
An offline map in Apple Maps
So, even if you have no internet connection, use Apple’s Maps as you usually would.
TIP: Do you need to share your location with another person (a friend, spouse, or co-worker)? Here’s all you need to know about sharing your location on an iPhone.
How to see, edit, and delete the offline maps downloaded on an iPhone
What if you’d like to check what maps you downloaded on your iPhone? To do this, follow the same first steps as earlier: open the Maps app on your iPhone, and tap your profile icon in the bottom-right area of the screen, in the location popup.
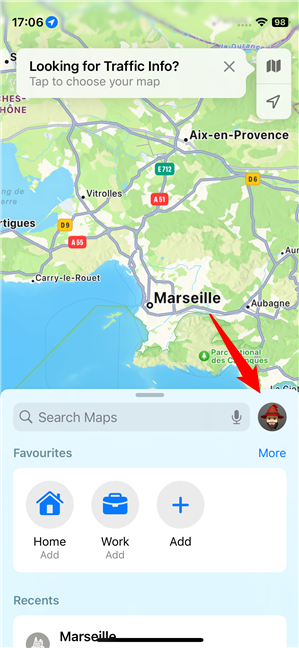
Tap the profile icon in Apple Maps
Next, tap on Offline Maps. A quick tip: to the right, you can see how many offline maps are saved on your iPhone.
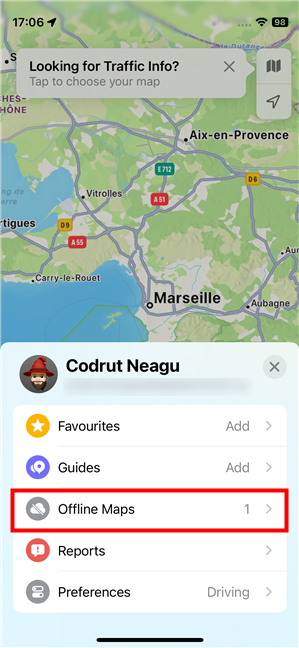
Tap on Offline Maps
The previous action will load a new information box where you can see a list of all the offline maps you have downloaded. If you want further information about one of them, tap its name.
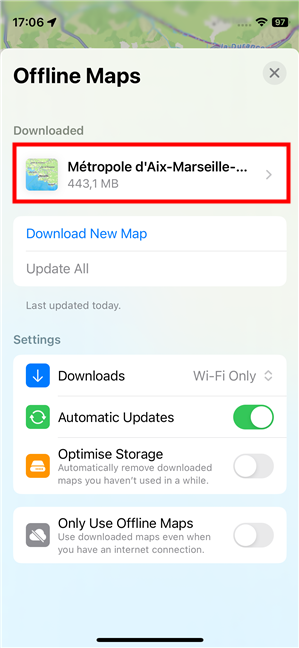
Tap the name of the offline map
iOS will then show you the offline map of the area you have saved. If you want to make it larger or smaller, you can edit its size by tapping the Resize button.
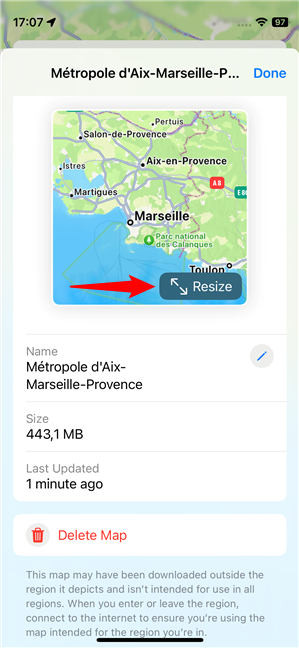
How to resize an offline map from Apple Maps
And if you want to, you can also change the offline map’s name by tapping the small pen icon next to its current Name.
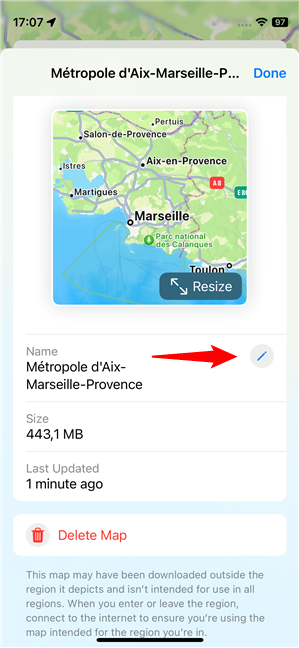
How to rename an offline map in Apple Maps
And last but not least, you can also delete an offline map if you decide you no longer need it, or simply because you want to free up some storage space on your iPhone. To do this, tap the Delete Map at the bottom of the offline map’s screen.
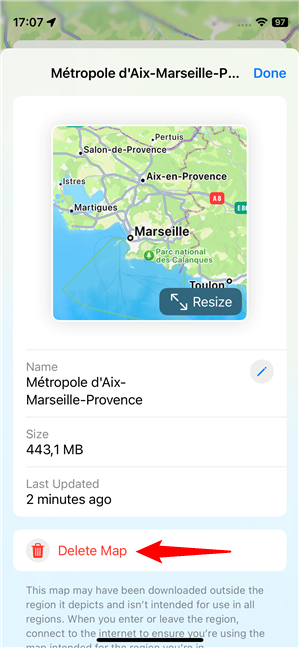
How to delete an offline map from your iPhone
Next, let’s see how to change the few offline maps settings available in Apple’s Maps app:
How to configure the settings for offline maps on an iPhone
Back on the Offline Maps screen (Maps > tap on your profile icon > tap on Offline Maps), you’ll also find a couple of settings for how the Apple Maps app works with offline maps. They are:
- Downloads: lets you select whether to download offline maps only when you are on a Wi-Fi network.
- Automatic Updates: if enabled, offline maps are updated automatically if there are any changes in the map data.
- Optimise Storage: if turned on, your iPhone will automatically delete any offline maps that you haven’t used for a while. If you’re working with multiple offline maps, you may want to turn on this setting to save on storage space and have iOS manage it for you.
- Only Use Offline Maps: if you activate this switch, your iPhone will only use your offline maps, even if you have a working internet connection. This setting is useful when you’re roaming with your iPhone, like when visiting another country where using mobile data is expensive.
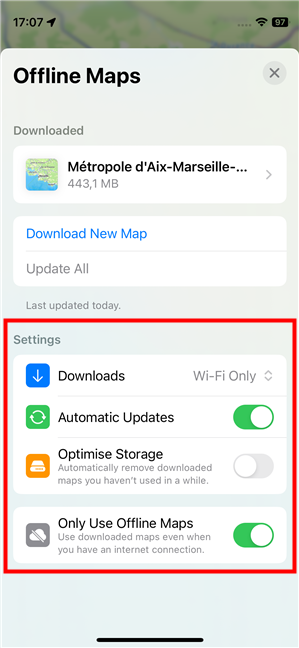
Settings for offline Apple Maps
That’s it! Pretty simple, isn’t it?
TIP: If you are roaming in another country with expensive data connections, you may want to block internet access for certain apps on an iPhone to save on costs.
Do you use Apple Maps offline?
As you’ve seen, downloading maps to use offline on your iPhone is quite an easy thing to do, just like using Apple Maps without an internet connection. It’s a feature that was missing from older versions of the app and iOS (before version 17), and something many waited eagerly for. Are you using offline maps on your iPhone now? What do you think about the way Apple implemented this feature? Is there something that’s missing? Let me know in the comments section below.


 19.01.2024