If you need to keep in touch with people from different time zones, you can add two additional clocks to the Windows taskbar to quickly check the time in their part of the world. Having multiple clocks available also comes in handy if you are traveling, as it allows you to schedule calls, meetings, and tasks without having to remember or search for the corresponding time zone. This guide illustrates the necessary steps to view the time for other parts of the world straight from the taskbar’s notification area in Windows 10 and Windows 11:
How to access the Additional Clocks in the Date and Time window
Regardless of the operating system used, adding multiple clocks requires you to first open the Additional Clocks tab of the Date and Time window. The steps for reaching this location are different in Windows 10 and Windows 11, so follow the instructions relevant to you.
How to access the Additional Clocks in Windows 10
First, right-click or press-and-hold on the time and date button from the Windows 10 system tray, and then click or tap on Adjust date/time from the contextual menu.
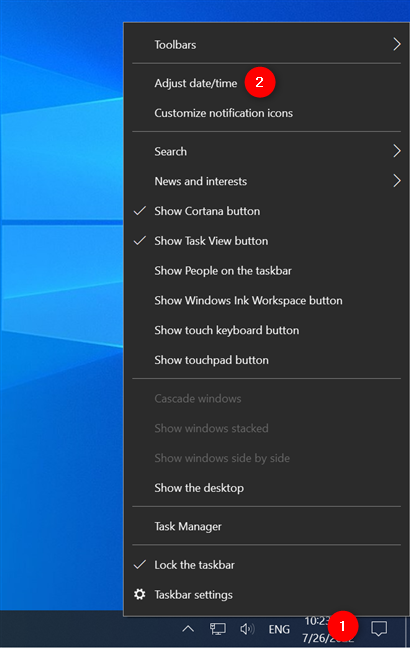
Press Adjust date/time from the right-click menu
This opens the Settings app and takes you to the Date & time tab from the Time & Language settings. In the right panel, find the Related settings section (scroll down if you have to) and click or tap on “Add clocks for different time zones.”
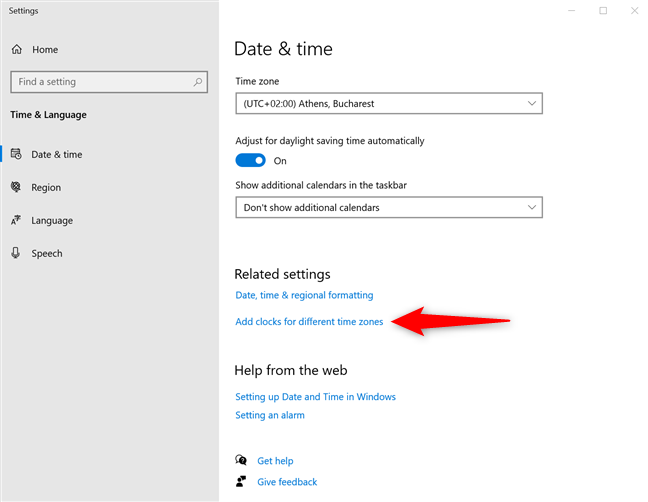
Access Add clocks for different time zones
This opens the Additional Clocks tab in the Date and Time window, where you can add more time zones to your taskbar.
TIP: If you want fast access to more time zones, you can also pin multiple clocks to the Windows 10 Start Menu.
How to access the Additional Clocks in Windows 11
If you’re using Windows 11, right-click or press-and-hold on the time and date button from the notification area. From the subsequent contextual menu, click or tap on “Adjust date and time.”
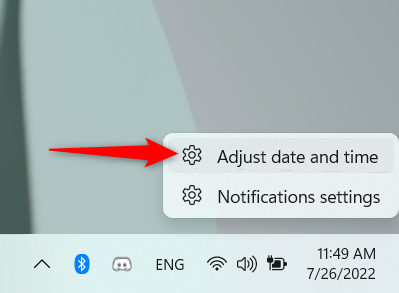
Access Adjust date and time from the right-click menu
The Settings app opens, showing the Date & time section from the Time & language tab. In the panel on the right, scroll down to the Related links and click or tap on Additional clocks.
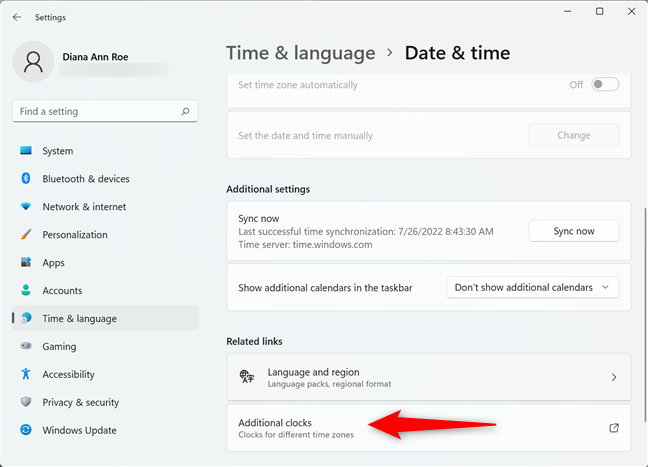
Access Additional clocks in Windows 11
This takes you to the Additional Clocks tab in the Date and Time window. Next, follow the steps described below.
How to add a clock to the taskbar in Windows 10 and Windows 11
Regardless of the operating system used, the Additional Clocks tab of the Date and Time window looks and works the same. You can use it to add up to two additional clocks to the taskbar. To enable an extra clock, check the “Show this clock” box by clicking or tapping on it.
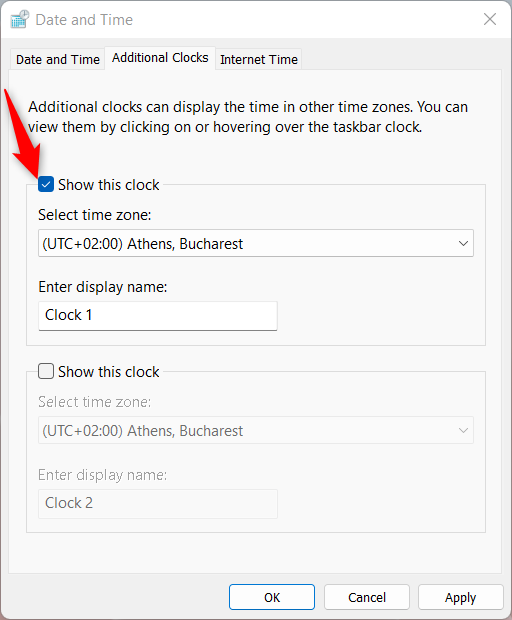
Check the box to start adding a clock
You can now edit the other options for this clock. Click or tap on the “Select time zone” field to open a dropdown menu. Scroll through the available options and select your desired time zone. We chose Pacific Time (US & Canada).
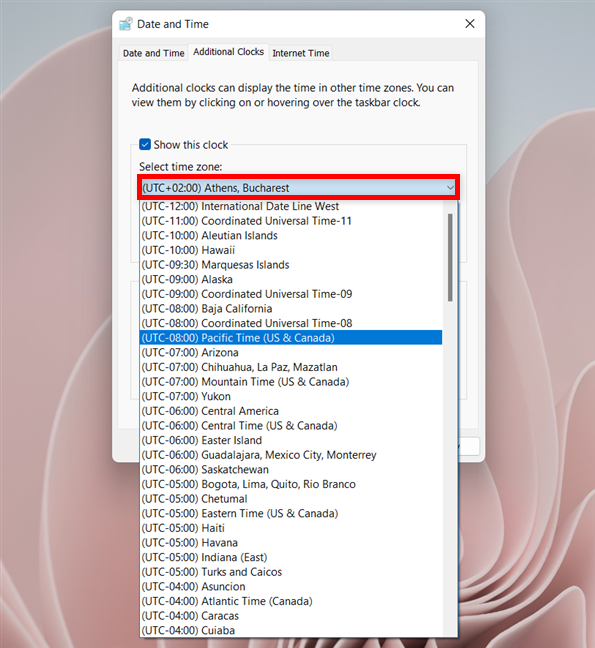
Scroll and then click or tap on the desired time zone
In the “Enter display name” field, you have the option to rename your extra clock to something less generic than the default Clock 1. Type in a suggestive name, like the name of the time zone or country or the city you are interested in - we wrote Pacific.
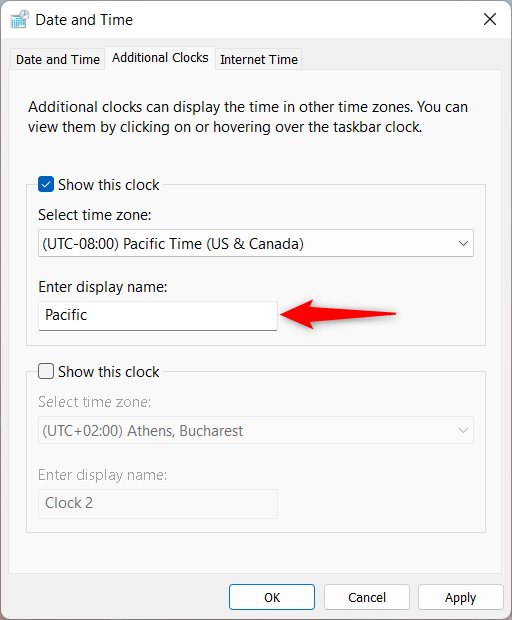
Enter another name for your clock
If you want to add a second additional clock to your taskbar, check the second “Show this clock” box as well. Then, select the time zone - in our case, (UTC + 05:30) Chennai, Kolkata, Mumbai, New Delhi - and type in a name for that clock - we entered India. If you uncheck the box for one of the extra clocks, the time zone is no longer displayed, but Windows remembers your settings. This lets you enable each clock when you need it, without having to redo the settings every time. When you are done, click or tap on either OK or Apply to add your clock(s) to the notification area/system tray.
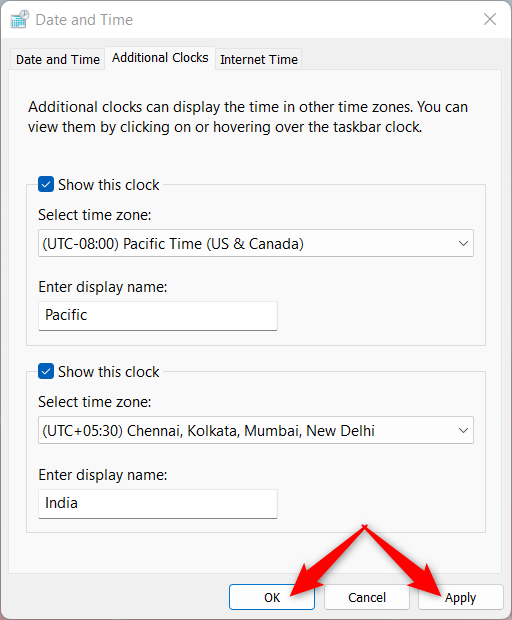
Press OK or Apply to add a clock to the taskbar
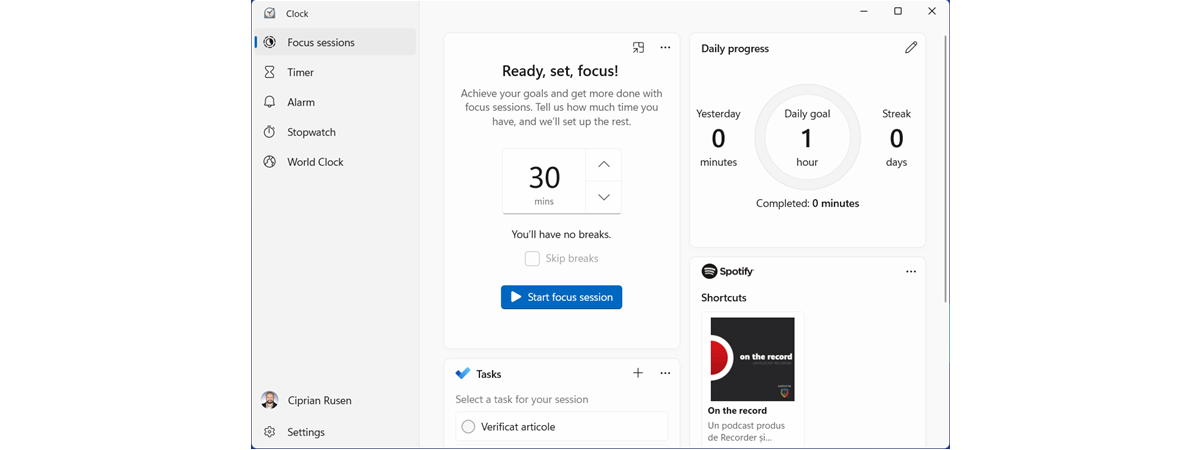
TIP: In Windows 11, you can use the Clock app to keep track of even more time zones. Here are 5 things you can do with the Windows 11 Clock app.
How to check the additional clocks in the Windows notification area
To quickly check the extra clock(s) you added, hover the mouse cursor over the time and date displayed in the system tray, on the right side of your Windows 10 or Windows 11 taskbar. A tooltip shows the additional time zone(s) you are interested in, alongside the Local time, as shown below.
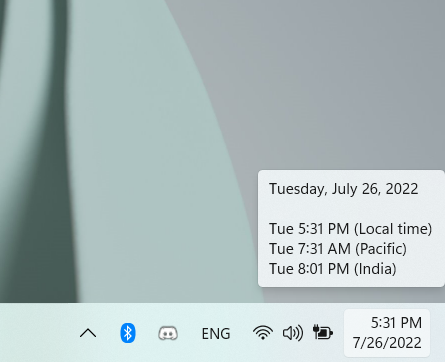
A tooltip displays the local time and additional clocks
Clicking or tapping on the time and date displayed in your taskbar's notification area opens a calendar pane, which looks slightly different in the two operating systems.
In Windows 10, the two extra clock(s) you want to keep an eye on are shown next to each other, under the local time at the top of the pane.
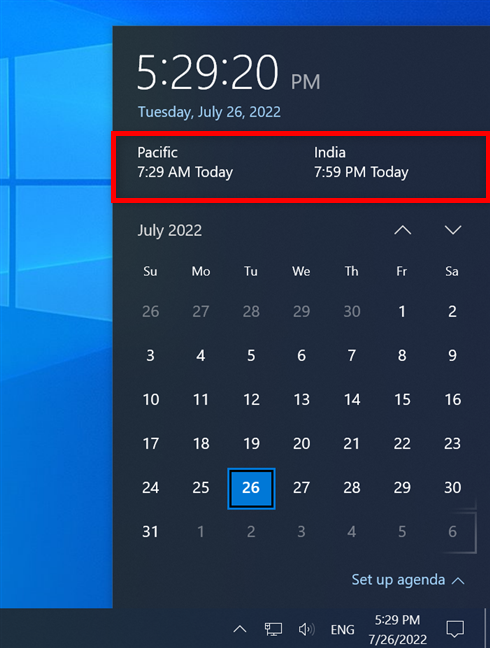
The additional clocks, as displayed in Windows 10
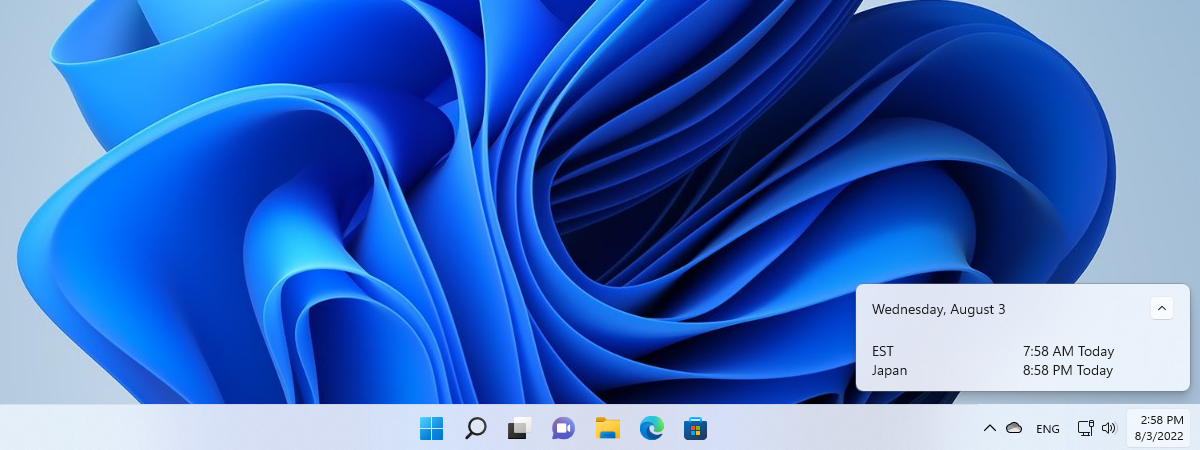
In the more subtle Windows 11 pane, the two new time zones are listed at the top, under the current date, as shown in the image below.
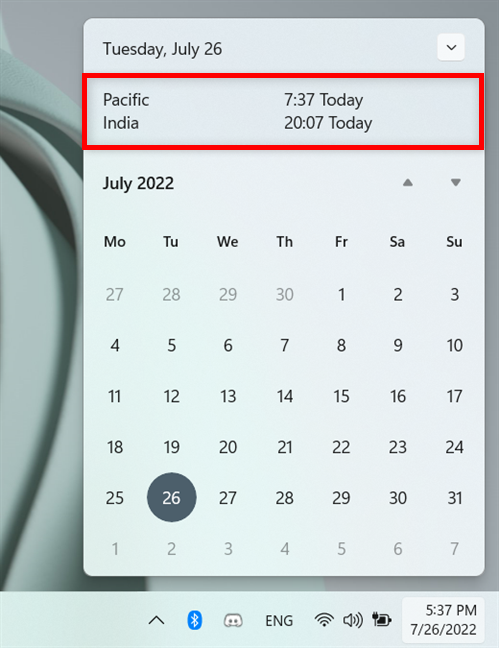
The additional clocks, as displayed in Windows 11
TIP: You can also use the Windows Clock app to list the times in multiple countries.
Why do you need additional clocks in Windows?
Now you know how to add a clock to the taskbar in Windows. We use additional clocks whenever we're traveling or if we're collaborating on projects with people from different time zones. This spares us the effort of having to convert time manually whenever we want to make a call or schedule a meeting. What about you? Why do you need extra clocks on the taskbar's notification area in Windows 10 or Windows 11? Let us know in the comments below.


 03.08.2022