While many everyday users might not immediately see the need to create random dummy files of a specific size, tech enthusiasts, software developers, and power users understand how valuable these files can sometimes be. Dummy files are useful for testing purposes, such as identifying bad sectors on a hard drive, measuring network speed, or ensuring that files are securely erased beyond recovery. Whatever your reasons, here are a couple of methods to create dummy files in both Windows 10 and Windows 11:
1. How to use CMD to create a file with dummy content (fsutil command)
All Windows versions since Vista include an executable named fsutil.exe. In both Windows 10 and Windows 11, you can find it in:
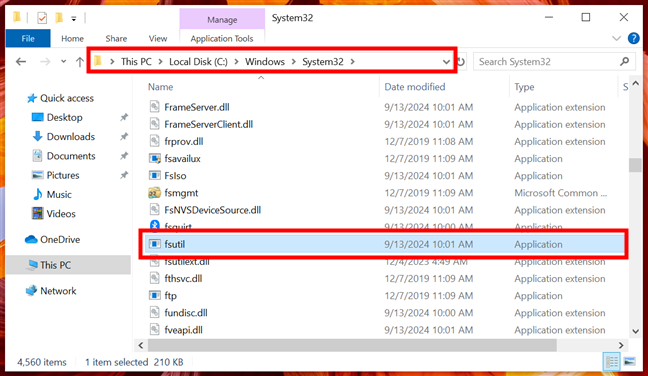
The folder containing the fsutil executable
Fsutil.exe is a powerful tool for managing partitions and volumes, and it can also be used to create dummy files of any size from the Command Prompt. If you want to launch the Command Prompt, search for cmd in the taskbar’s search field, and then click or tap Command Prompt. If you need to create files in a protected folder, such as the system drive (C:), choose to Run as administrator instead so that the Command Prompt has the required privileges to create such files for you. This is what it looks like in Windows 10:
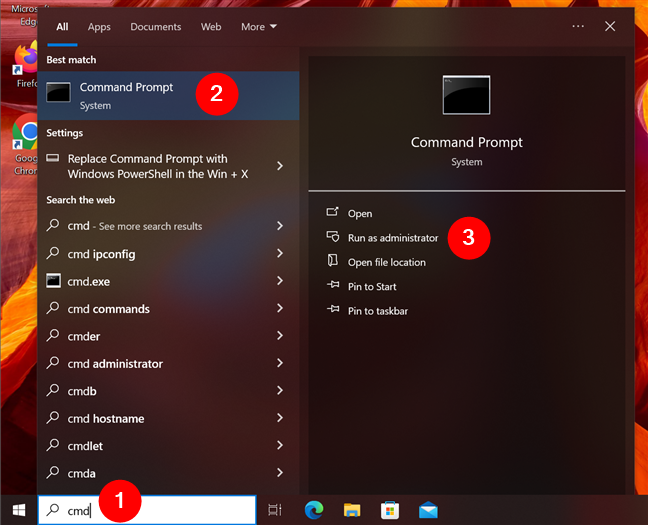
Open Command Prompt in Windows 10
And this is what launching Command Prompt from the taskbar looks like in Windows 11:
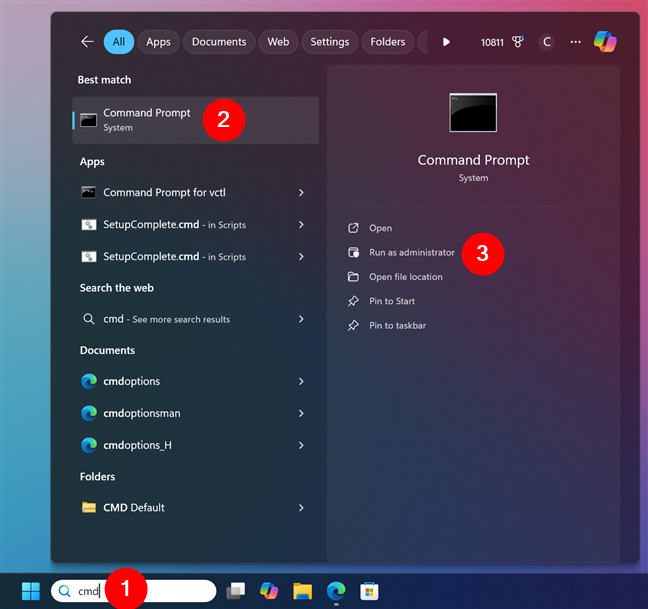
Open Command Prompt in Windows 11
Once the Command Prompt is open on your Windows 10 or Windows 11 computer, type the command as is:
Hit Enter and you get to see a list of commands supported by this tool. As shown in the screenshot below, there are many parameters that you can use.
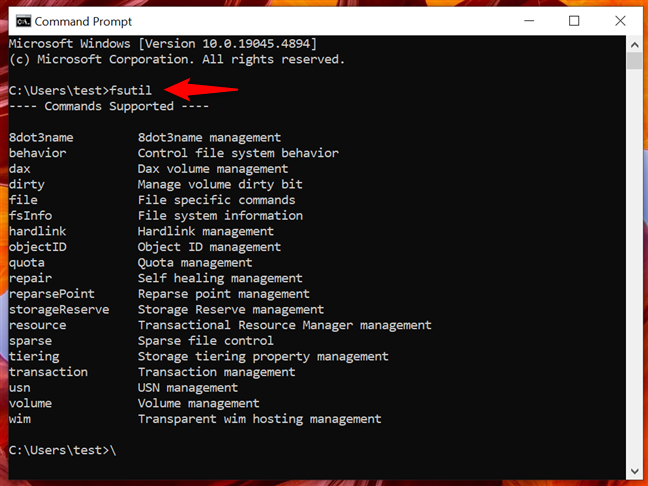
The list of commands supported by fsutil
TIP: This only gives you a taste of what fsutil.exe can do. You can find complete information about its capabilities in its official documentation on TechNet.
There are two commands you can enter in the Command Prompt to create a dummy file:
or
Replace filename with the name you want for the dummy file. You can choose to add a file extension or not, as this does not affect the process. Replace size with the size you want your dummy file to have. The size is measured in bytes and it might be easier to use an online converter to help you define the size you prefer.
The difference between the two commands is that the second one allows you to specify exactly where your file is stored, by replacing path with a location of your choice on your device.
Now that we got over the theory part, let’s see how this works in practice. I first created a file called myfile.exe with a size of 10 MB or 10485760 bytes. To create it, I entered the following command:
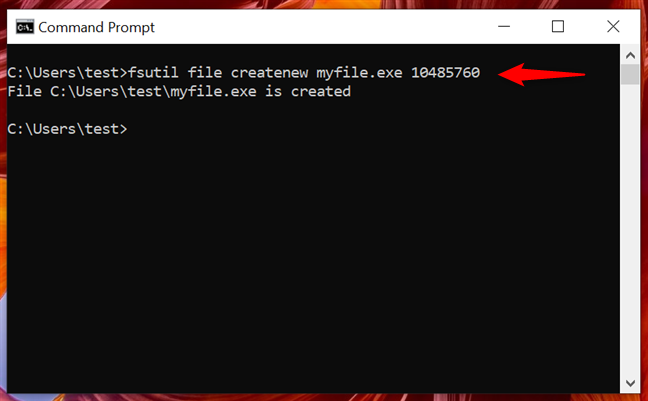
Creating a file using the first command
As seen above, if you use the first command and don’t specify a path, the file is created in your user profile folder. In my case, it was stored in:
I then created another 2 MB file, this time using a specific path and no extension. I entered:
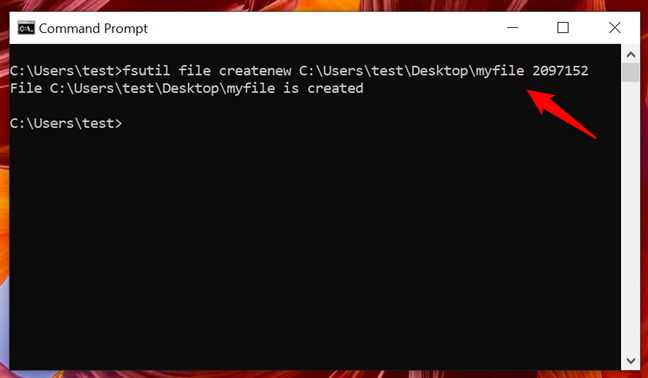
Creating a file using the second command
IMPORTANT: One aspect to note is that the files created with fsutil.exe are empty. There’s no content inside.
2. How to use PowerShell to create a dummy file in Windows
You can also create a dummy file using PowerShell in both Windows 10 and Windows 11. There are many ways to launch this app, yet one I find easiest is to type powershell in the taskbar’s search field, and then click or tap the Windows PowerShell result. However, if you plan to create random dummy files on your system drive (C:), make sure to select “Run as Administrator” from the options on the right. This is what it looks like in Windows 10:
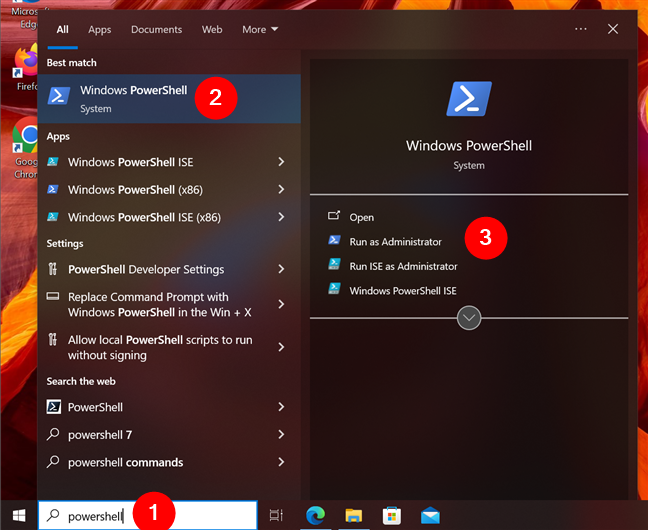
Open PowerShell in Windows 10
And this is how to open PowerShell in Windows 11:
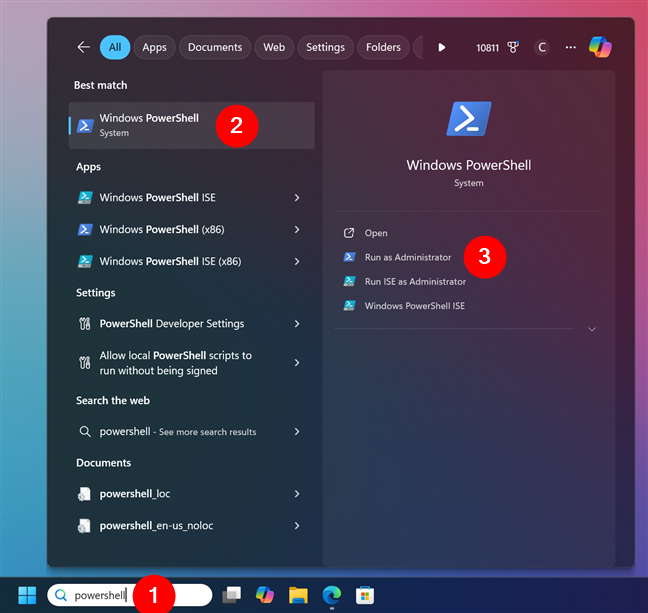
Open PowerShell in Windows 11
Then, you need to enter the following one-line command to create a dummy file in PowerShell:
Replace size with the size your dummy file should have, in bytes. You can use an online converter if you need help defining the size, especially if you want Windows to create a large file with random data. Replace path with the location where you want to create the dummy file. Replace filename with the name you want for the dummy file. Add a file extension if you want to. Let’s illustrate this with an example to make it clearer:
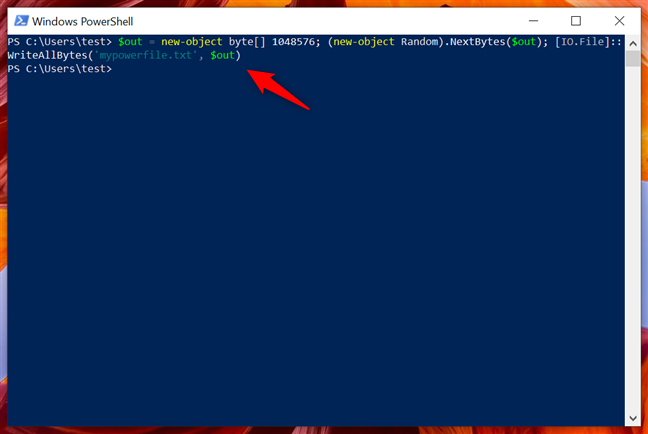
I decided to create a file called mypowerfile.txt with a size of 1 MB (or 1048576 bytes) on the desktop. I entered the following command to create it:
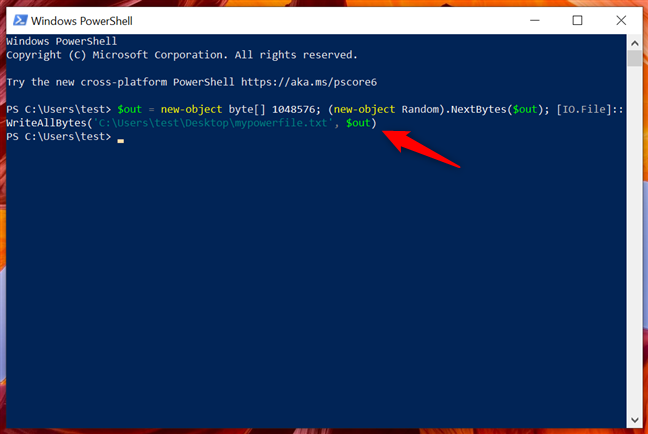
Create a dummy file using PowerShell
Although PowerShell doesn’t offer real-time feedback (unless you’ve made an error writing the command), you can tell it is done creating the file when it is ready for another command. If you go to the specified location, you can see that the dummy file has been created.
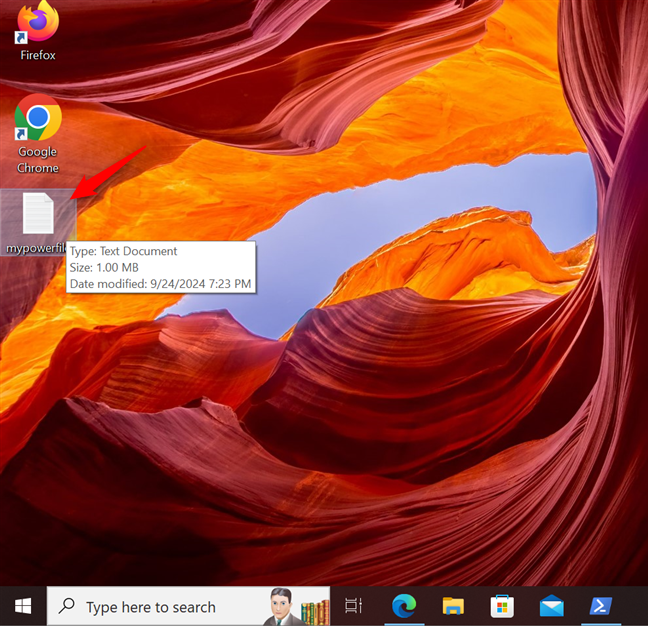
A dummy file created with PowerShell
Similar to using fsutil in the Command Prompt, you can leave out the path and the file is created in your user profile folder. I used the same command as above, leaving out the path entirely:
Create a dummy file without specifying the path
Without a path, the new dummy file is stored by default at:
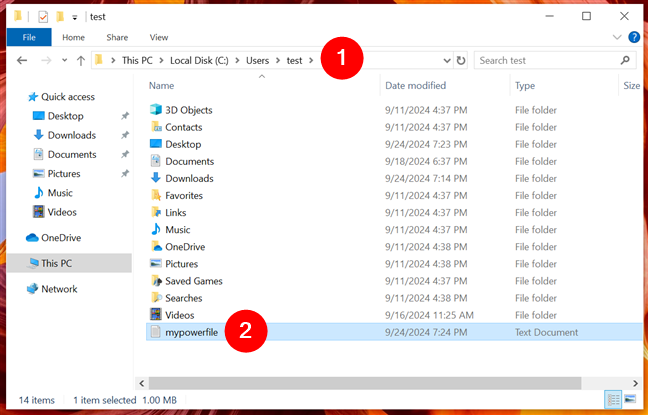
Files without a specified path are created in your user profile folder
IMPORTANT: As opposed to fsutil, which creates empty files, PowerShell lets you create fake files with randomly generated content. If you compare two files, created using the same command, you can see that they have different content.
Out of all the options in this article, PowerShell is the most complicated, both because of the complexity of its commands and the absence of confirmation when your dummy file is generated. However, power users may prefer it to the other options.
TIP: When using the PowerShell commands above, you can add a parameter that makes the console provide feedback, while creating dummy files. However, keep in mind that this makes the command unnecessarily long, as you have to insert the following one-liner:
3. How to create a random dummy file with a third-party fake file generator
If you want dummy files with random content, or if you are uncomfortable with the Command Prompt, then you should consider using a third-party app such as the Dummy File Creator, which is free and easy to use. When choosing how to download it, I recommend you to get the archive and extract it somewhere on your computer. Then, run the Dummy.exe file. If you want to generate files on your system drive (C:), right-click or press-and-hold and select Run as administrator, or the program will return an error when it tries to create your fake files.
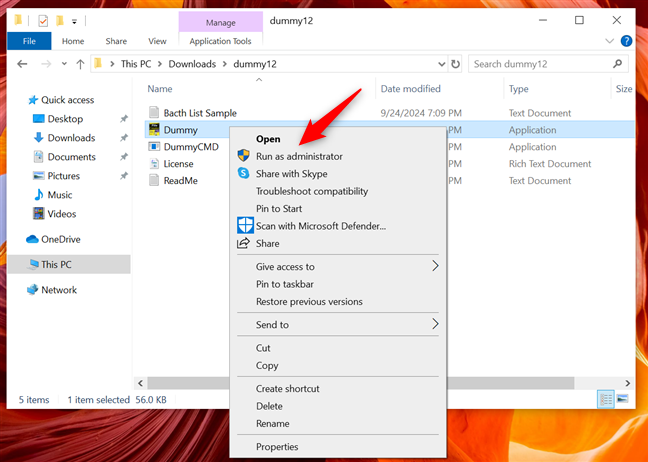
Run Dummy.exe to start creating dummy files in Windows
While in need of a makeover, the interface of this program is straightforward. The Mode section lets you choose whether you want to generate one file or more. Use the Browse button to get to the location where you want to create the file(s) and type in the name (and extension, if you want one). Next, specify the File Size and check the “Random file content (non-compressible)” box if you want your file(s) to have random content. Then, click or tap Create.
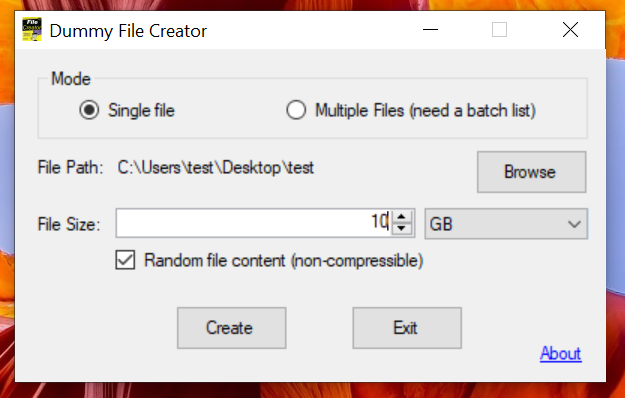
Customize your dummy file(s) and press Create
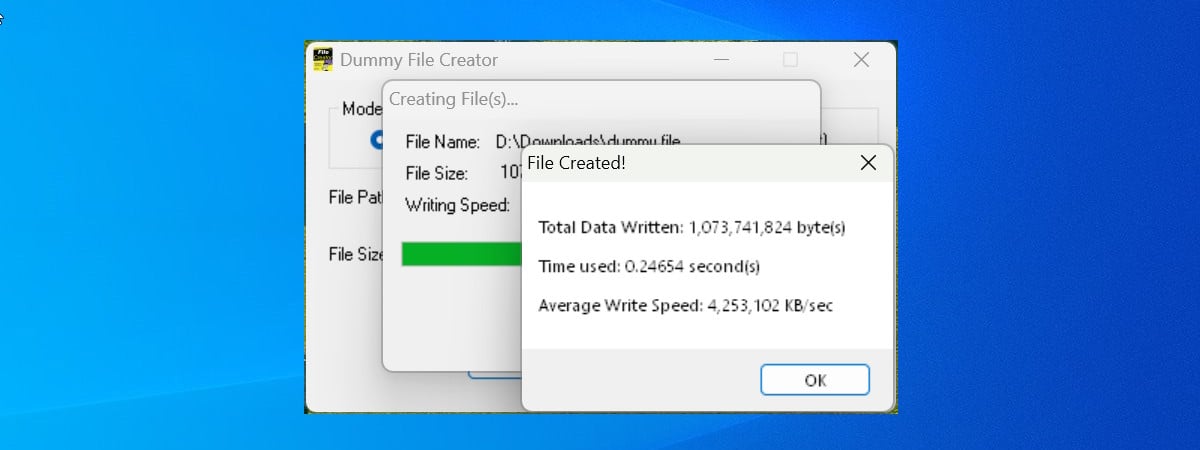
A progress bar keeps you updated while your file is being created. As soon as the program finishes writing, you get a notification informing you that your file was created.
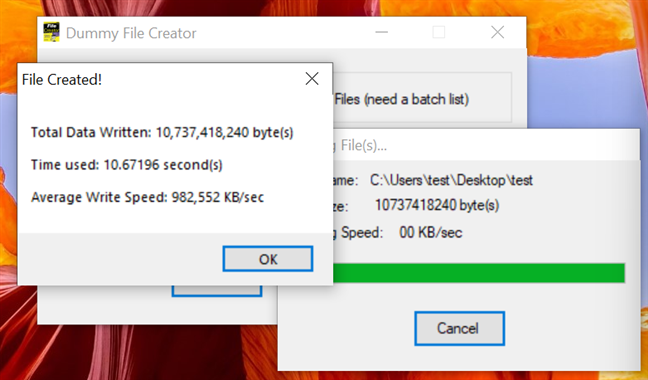
A pop-up lets you know the file was created
This tool is obviously easier to use than CMD or PowerShell to create empty files, and it also comes with several advantages, like creating more files at the same time and the option to add random file content.
Which method do you find easiest?
I searched the pits of the internet and downloaded one too many suspicious files in order to bring you this tutorial. Whichever method you choose, Windows provides multiple ways to create dummy files, whether you’re using the Command Prompt, PowerShell, or third-party tools. Let me know which method works best for you, and feel free to share any additional techniques for generating dummy files in the comments.


 01.10.2024