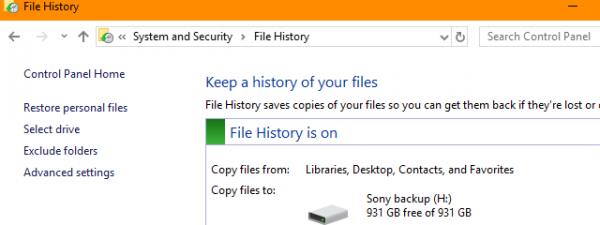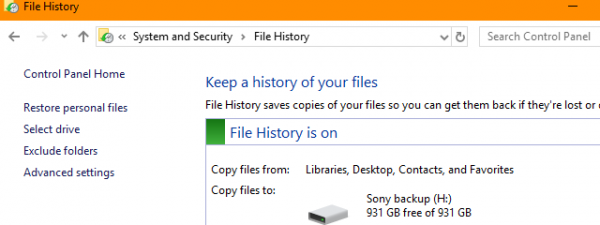
File History is a useful app that is built into Windows 10 and Windows 8. It can be used to automatically back up personal files and folders, like your documents, pictures, and videos, without any user intervention, except for turning it on, and configuring how it works. If you use Windows 10, you can interact with File History both from the Settings app and the Control Panel. In each of these places, you get access to different settings and options for File History. Here is everything that you can do with File History from the Control Panel:
NOTE: This guide applies to both Windows 10 and Windows 8.1.
How to access the File History from the Control Panel
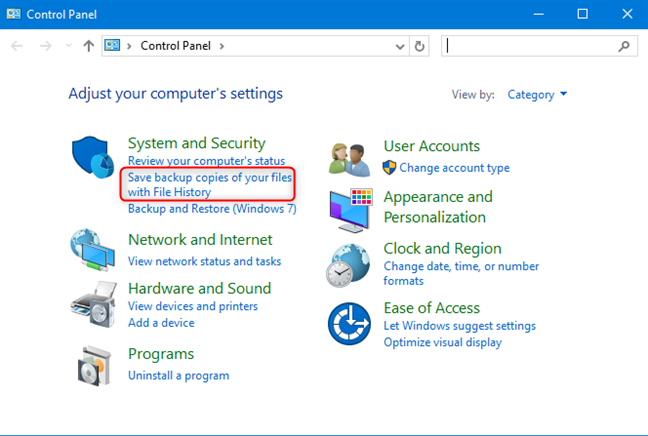
Open the Control Panel, and click the link that says "Save backup copies of your files with File History."
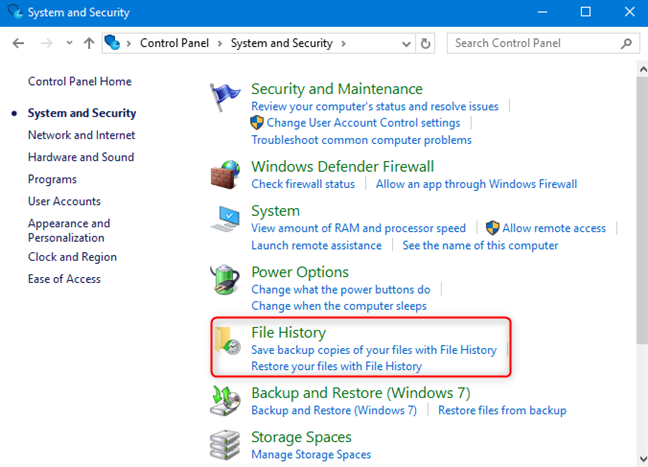
Alternatively, you can click on System and Security and then on File History.
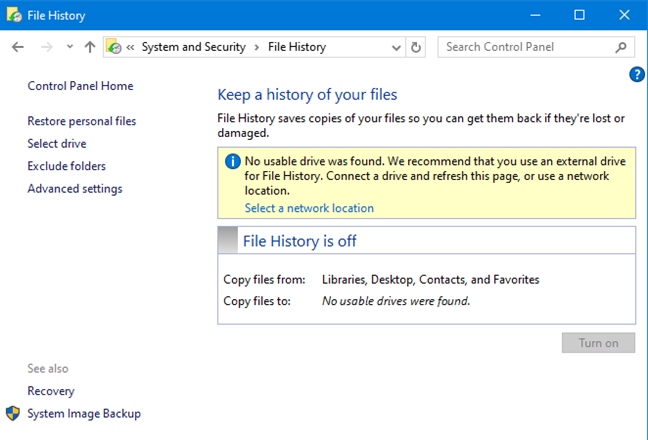
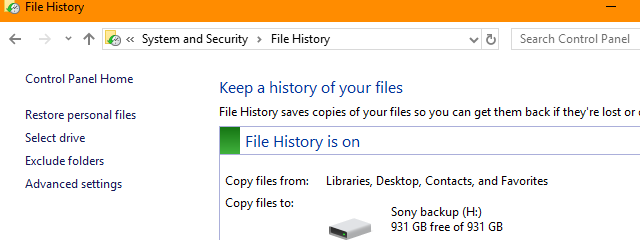
Now you should see the File History window. If there is no usable storage drive found, the window should look similar to the screenshot below.
How to turn File History on and off in Windows 10
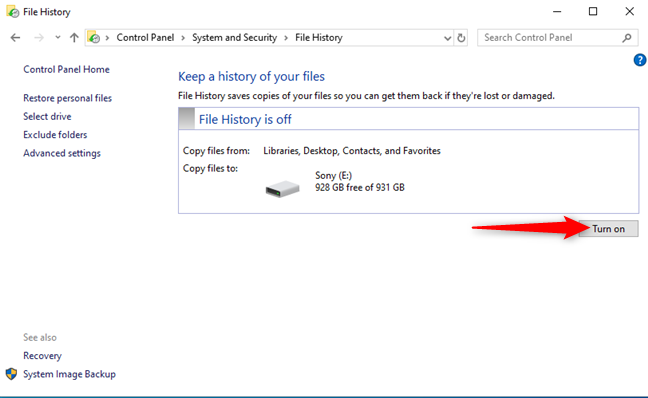
To use File History, you have to plug in an external hard drive or a large USB memory stick with plenty of free space on it. File History should detect it, and display it as the default drive for your backup. All you have to do next is click or tap the "Turn on" button, and File History starts with the first backup.
NOTE: If you have set up a Homegroup in your home network, you may be asked if you want to recommend the drive to other members of your Homegroup.
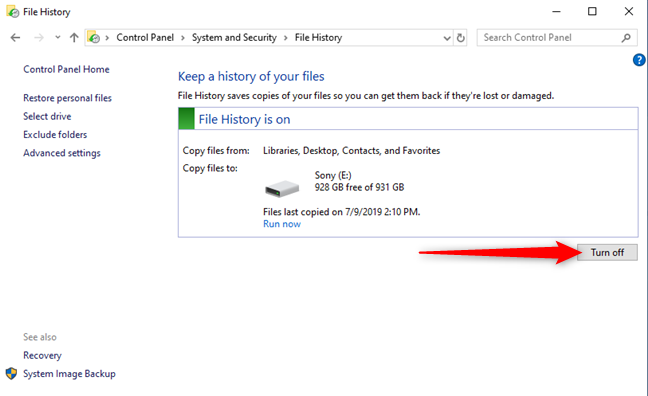
If you want to stop File History temporarily, or you want to stop using it, go to the same File History window, and click or tap Turn off.
Then you can unplug your backup drive, delete the data on it, or do whatever you wish. File History is no longer working until you manually activate it again.
How to change the storage drive used for File History backups
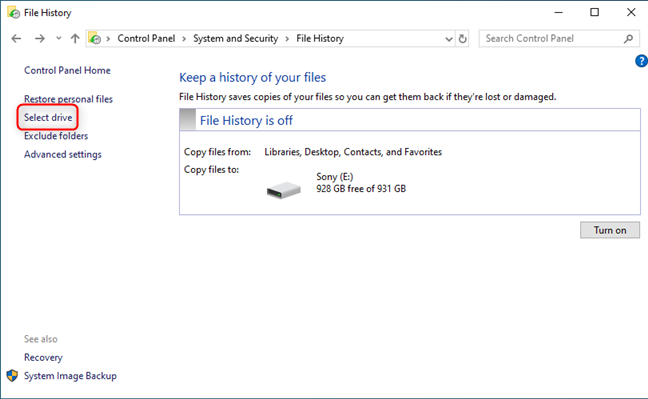
If you are not satisfied with the drive that File History has chosen, and you have more than one storage drive connected to your PC, you can choose another drive for File History. To do that, in the File History window, click or tap the Select drive link on the left.
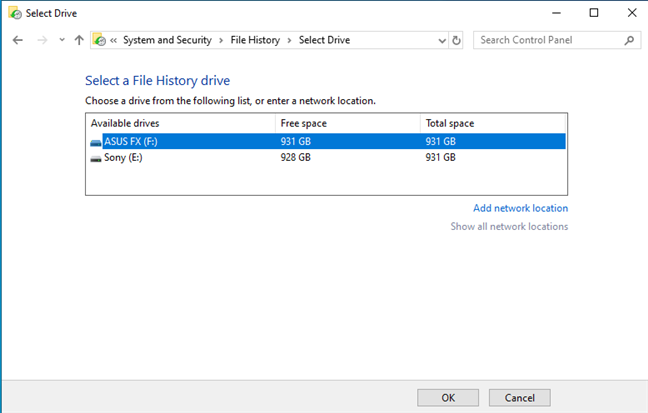
The Select Drive window opens, where you see the drives that are available for use. Select the drive that you want, and click or tap OK.
NOTE: If the drive that you want is not shown on the list, make sure that it is connected to your Windows PC, and then click the Refresh icon or hit the F5 key on the keyboard.
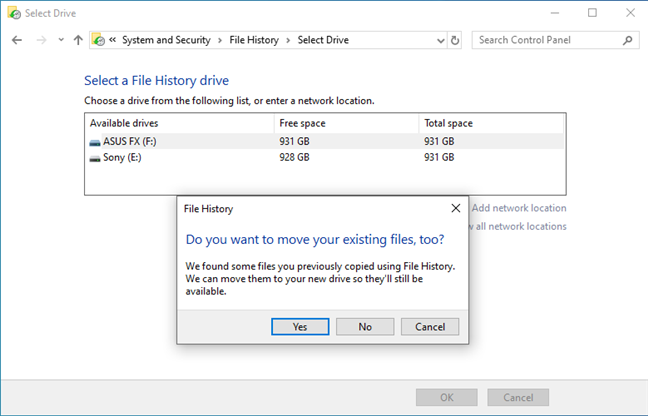
If you have used File History on another drive in the past, you are going to be asked whether you want to move your existing backup files. Answer Yes or No, depending on what you want.
What data does File History backup and how long does it take to perform a backup?
File History has a predefined set of items that it backs up automatically: your user folders and libraries, the desktop, saved games, favorites from Internet Explorer, and searches. When using File History from the Control Panel, you cannot set which specific folders it can back up; you can only set what folders and libraries to exclude. For more control over this aspect of File History, you have to use this feature from the Settings app, instead of the Control Panel. For more information, see this guide: How to use File History to back up your data in Windows 10.
How to remove folders from the File History backup
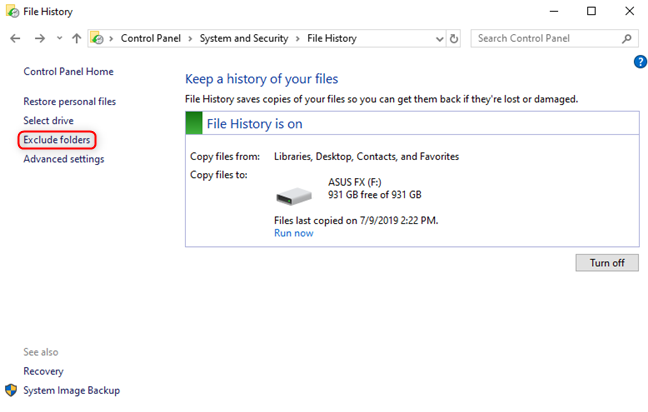
To exclude a folder from the File History backup, click or tap Exclude folders in the column on the left.
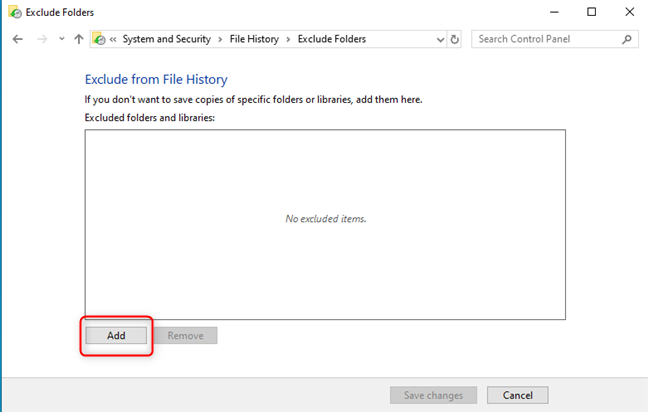
In the Exclude folders window, click or tap the Add button.
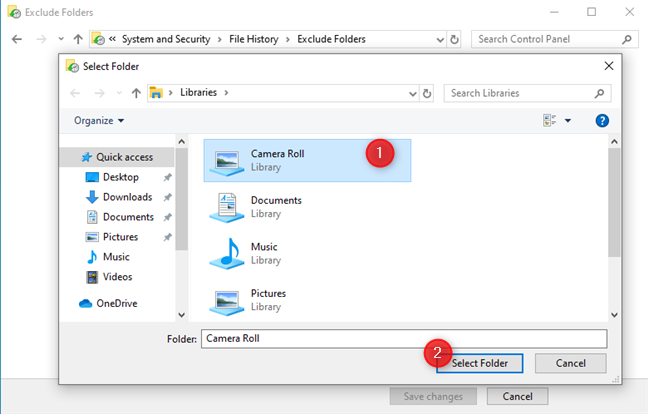
In the Select Folder window that opens, navigate your PC, choose the folder that you want to be excluded from the backup, and click or tap Select Folder.
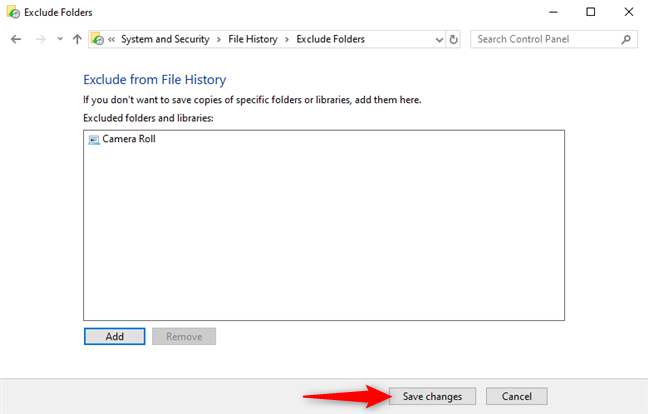
The selected folder is now displayed in the list "Exclude from File History." Continue adding as many folders to the exclusion list, as you want. When done, press Save changes.
The selected folders are no longer backed up by File History.
Configure how often File History runs, and how much it stores your data
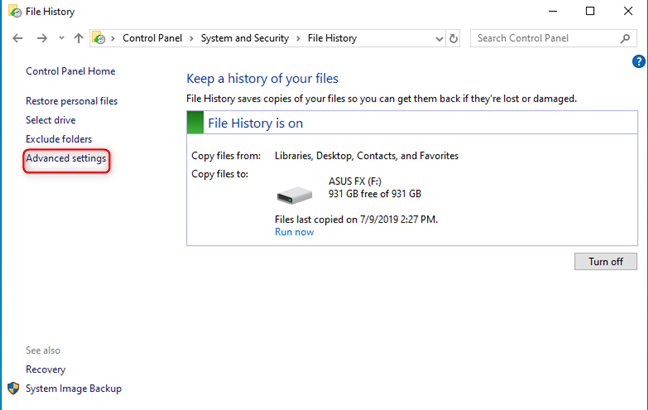
The default settings for File History are not the best for everyone. To change how File History works, click or tap the Advanced settings link on the left.
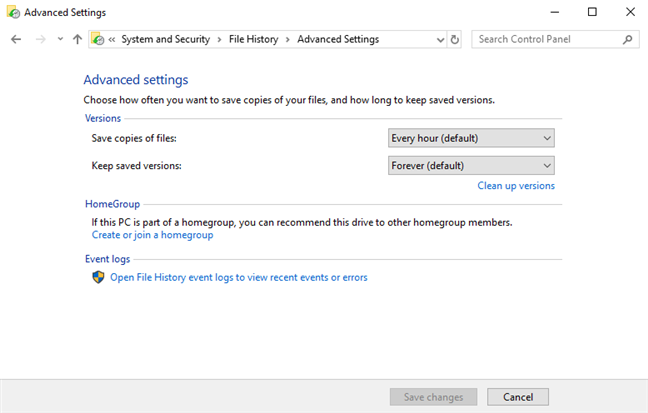
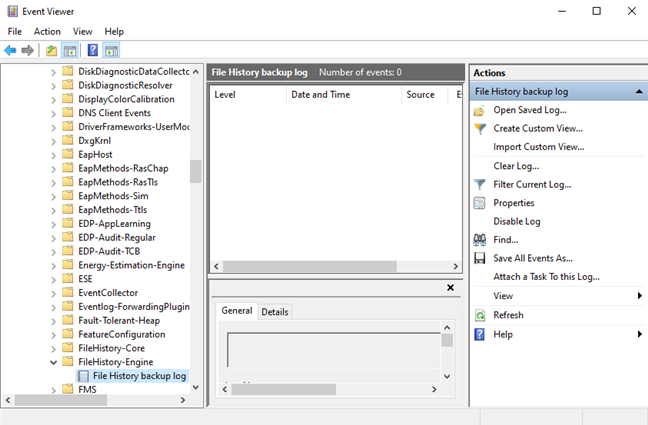
In the Advanced Settings window, you can set how often File History runs, for how long it keeps saved versions of your files, recommend its drive for backups to other Homegroup members, and open the File History event logs.
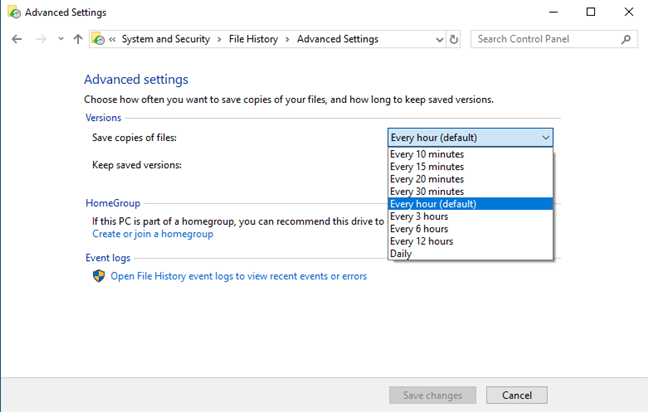
To change how often File History backups up your data, click the drop-down list for "Save copies of files," and choose the backup frequency. Running File History once every hour should be enough for most people.
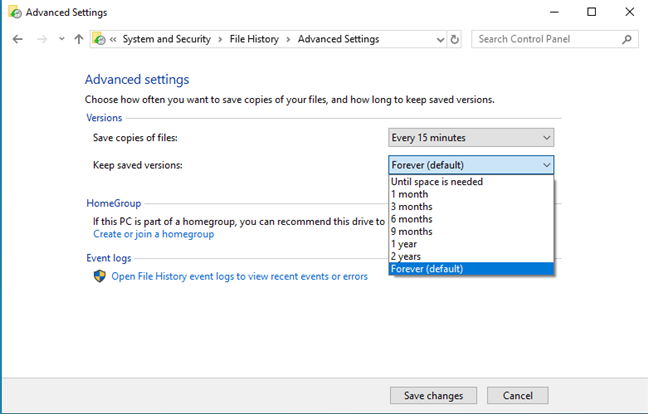
By default File History keeps saved versions of your files, forever. If you edit, add, or remove files frequently, this setting may leave you out of storage space for backups, relatively quickly. Click on the dropdown list for "Keep saved versions" and choose another time frame for keeping your old file versions. Most people should use a value between 1 month and 6 months.
If you had problems with File History and you want to understand what is going on, in the Advanced Settings window, click or tap the link that says: "Open File History event logs to view recent events or errors." This action opens the Event Viewer, where you can see more data about your problems.
When you are done improving how File History works, do not forget to press the Save changes button, so that your changes are applied.
How to manually run a File History backup
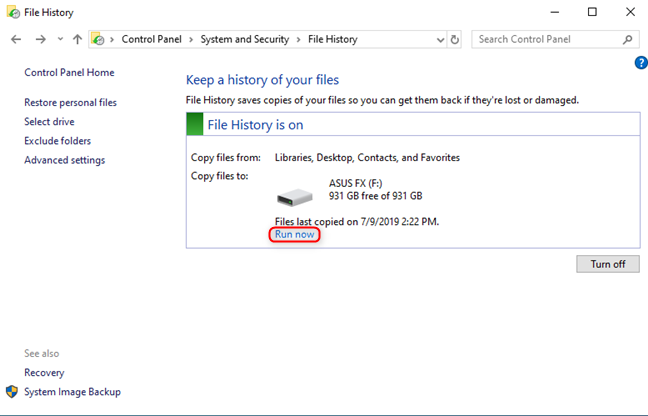
After you set it up, File History does its job in the background, automatically, as long as the storage drive that it uses is connected to your PC. However, you may need to run a manual backup, right now. To do that open the File History window as shown earlier in this guide, and click or tap the Run now button, highlighted below.
File History backs up your newest files from the backup locations that you chose.
What happens when you disconnect the File History backup drive
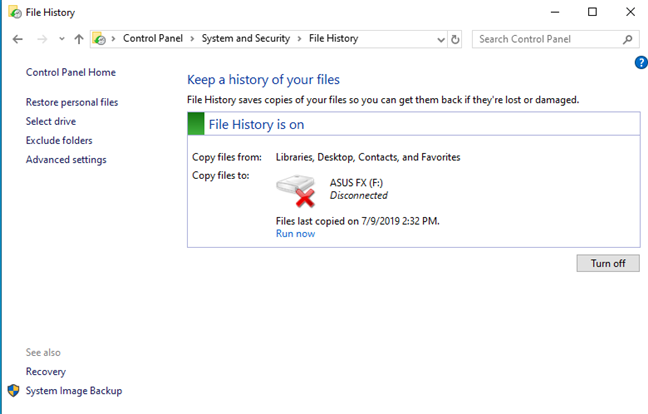
A significant feature of File History is that it works silently in the background, without taking up too much processor time and without stressing your hard disk. It takes a while for this tool to backup data, especially the first time you do it, but it works flawlessly without user input. If you unplug the backup drive, File History stops using that drive, and it backs up your data to a temporary location on your C: drive. Also, the default storage drive is highlighted as Disconnected.
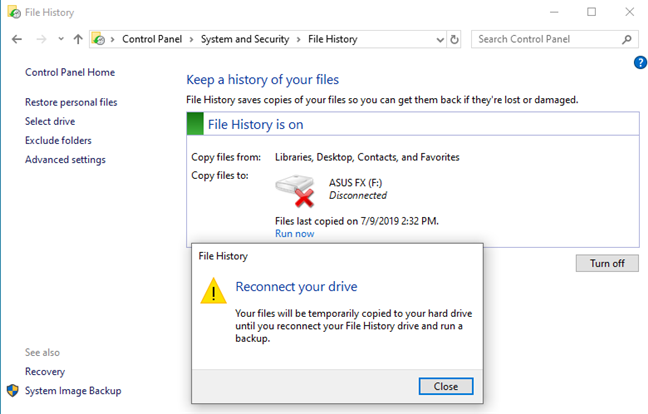
If you try to run a manual backup, while the storage drive is disconnected, File History says that: "Your files will be temporarily copied to your hard drive, until you reconnect your File History drive and run a backup."
After you plug the drive back in, File History resumes backing up your data to it, without any intervention on your part.
Do you enjoy using File History?
Our team at Digital Citizen uses File History for backing up personal files and folders. We also back the same files to the cloud, through OneDrive, so that we always have two copies available for recovery. Try this useful feature of Windows 10 (and Windows 8), and tell us how well it works for you, in a comment below.


 09.07.2019